More Aussie drivers are ditching the detours to public charging stations and installing EV chargers at home for convenience, cost savings, and more eco-friendly driving.
After choosing the best EV charger for your home and vehicle, the next logical question is, “How do you install an EV charger at home?” Can you DIY, or do you need professional help?
We’re here to explain what’s involved in installing an EV charger at home, from how much it costs to the installation process, whether DIY or professional.
Why Install an EV Charger at Home?
- Greater Convenience: Charge while you’re at home during the day or sleeping at night. No need to drive out of your way or queue at public stations.
- Lower Charging Costs: Home charging is usually cheaper than public stations, especially if you set your charger to run during off-peak times. Energy providers offer discounted rates when electricity demand is lower, typically late at night or early in the morning.
- Better Energy Efficiency: Pairing your charger with solar panels, an inverter, and a battery lets you use clean, renewable energy to power your EV, cutting carbon emissions and energy bills.
- Future Flexibility: Having a charger at home means you’re ready to upgrade to a newer EV model, switch brands, or add a second EV. Most home chargers support a wide range of EVs, so you won’t need to reinstall new equipment whenever you change cars.
- Higher Property Value: Homes with EV chargers are becoming more desirable as more people switch to using EVs.
Types of Home EV Chargers
Level 1 Chargers
Your EV should come with a free Level 1 charger that plugs into a standard residential 230–240V power outlet.
With a power output of around 2.4 kW, they’re the slowest EV charger, taking 12–20+ hours to fully charge most EVs. You can expect to add 10–15 km of range to your EV per hour of charging.
Because of their slower charging speed, Level 1 chargers are a good option if you don’t drive much or only need to top up occasionally.
Most Level 1 chargers don’t offer smart features like app control or charging schedules. They also aren’t usually compatible with solar systems; instead, they draw power from the electricity grid.
Level 2 Chargers
Level 2 EV chargers use a dedicated 230–240V circuit with higher amperage to deliver more power to your car in less time than a standard power point. An electrician will wire the charger directly into your switchboard.
Most homes run on single-phase electricity, which supports Level 2 chargers with an output of around 7.2 kW. These chargers can add 30–50 km of range per hour and fully charge an EV in 4–10 hours. Larger or rural properties with three-phase power can support chargers up to 22 kW, which add up to 120 km of range per hour and deliver a full charge in just 1.5–4 hours.
You can buy a Level 2 charger from your car dealer, EV charger retailers, or online stores. They’re ideal for daily use, longer commutes, and multi-EV households.
Smart Chargers
Many Level 2 chargers include smart features such as
- App Control: Start or stop EV charging, check charging status, and get notifications through a mobile app.
- Charging Scheduling: Set the charger to run at specific times, like during off-peak hours when electricity is cheaper.
- Energy Monitoring: Track how much energy your EV uses and view your charging history to give you better insight into running costs and power usage.
- Load Management: Automatically balances the charger’s power use with the rest of your household to prevent overloading your electrical system.
- Solar Integration: Use excess solar power to charge your EV instead of drawing from the grid. Some chargers can prioritise solar usage or mix solar and grid power for maximum efficiency.
Key Requirements for Installing an EV Charger at Home
Before you install an EV charger at home, there are some important things to consider.
The power your home has affects what kind of charger you can install and how quickly your EV can charge.
Most homes in Australia use single-phase power, which can handle a basic Level 1 charger or a Level 2 charger with an output of around 7.2 kW for faster, overnight charging. Larger homes or rural properties with three-phase power can support faster chargers up to 22 kW.
If you choose a Level 2 charger, it will need a dedicated circuit so it doesn’t compete with other appliances in your home. An electrician will assess your switchboard to make sure it has enough capacity and upgrade it if needed.
Lastly, think about where you’ll install the charger. It should be near where you park your EV and within reach of the charging cable. The spot should also be easy to access, protected from the weather, and safe from potential damage. Wall-mounted units in garages or under carports are common, but outdoor setups can work too, as long as the charger is weatherproof and professionally installed.
Step-by-Step Guide to Installing an EV Charger at Home
Level 1 Charger
Installing a Level 1 EV charger is a DIY job.
- Your EV should come with a Level 1 charger. Take it out of the boot or storage compartment.
- Find a power point close to where you park your EV. A garage or undercover carport works best.
- Plug the charger into the power point. No special tools or installation are needed.
- To keep things tidy, you can mount the charger on a wall using a bracket or hook. If a bracket/hook isn’t included, you can buy one from Bunnings or an online EV accessories store.
- Plug the charger into your EV. Check your EV’s dashboard or app to track charging progress.
Level 2 Charger
Installing a Level 2 charger is more difficult and must be done by a licensed electrician. High-voltage wiring and compliance with electrical safety regulations are involved.
Your electrician will
- Assess the switchboard and wiring. They’ll inspect your switchboard to confirm it can handle the charger’s load, checking your wiring, power type (single or three-phase), and space for a new circuit breaker. Your switchboard may need an upgrade.
- Run a dedicated circuit. Because EV chargers need their own circuit, the electrician will install new cabling from your switchboard directly to the charger’s location. They’ll plan a safe, efficient cable path that avoids other wiring or plumbing.
- Install a safety switch. It is a legal requirement to install an RCD (residual current device). This safety switch reduces the risk of electric shock and faults.
- Mount the charger. Once the wiring is complete, the electrician will mount the charger on a sturdy wall or surface using a bracket or mounting kit. They’ll discuss the location with you: somewhere protected from the elements, easy to access, and near where you park your EV.
- Connect the charger and test the system. The electrician will wire the charger into your power supply, test that everything works correctly, and check that the installation meets Australian standards (AS/NZS 3000). They’ll provide a Certificate of Compliance to confirm they did the job safely and legally.
- Set up any smart features. If your charger has an app or smart control system, the electrician can connect it to your Wi-Fi and guide you through features like remote charging, scheduling, and monitoring.
- Configure solar charging (if applicable). If your home has solar panels, the electrician can link the charger to your solar system so it prioritises solar energy when available. If you also have a solar battery, they can configure your system to store daytime solar energy and use it for overnight charging.
DIY vs. Professional Installation
While installing a Level 2 charger yourself might be tempting to save money, it’s not a safe or legal option.
These chargers draw much more power than a standard appliance and must be wired directly into your switchboard. Handling high-voltage electrical work without a licence can lead to safety risks, fire hazards, and insurance issues.
DIY installation doesn’t comply with Australian electrical standards, which could void your EV charger’s warranty or create problems when selling your home.
Hire a licensed electrician to get the job done safely and correctly. They’ll make sure your switchboard can handle the charger, install the correct safety switches, and provide a Certificate of Compliance to protect your warranty and give you peace of mind.
Costs of Installing a Home EV Charger
How much does it cost to install an EV charger at home?
The answer varies depending on the charger, installation complexity, electrical upgrades, and solar integration.
As discussed, a Level 2 EV charger requires professional installation. Including labour and materials, basic installation can cost $700–$1,300. The chargers themselves can range from $500 to $2,000. So you can expect to pay a total of $1,200–$3,300.
If your switchboard is older or undersized, you could pay $900–$1,800 for a single-phase upgrade or $1,500–$3,500 for a three-phase upgrade.
If you want to integrate the charger with your solar system, there may be additional costs for solar-compatible chargers, components, and system configuration. Your electrician may charge a flat rate or by the hour for solar integration. The hourly rate could range from $80 to $130, depending on location and job complexity.
EV Charger Incentives in Australia
Some state and territory governments offer incentives for installing an EV charger at home.
In the Northern Territory, the EV Charger Grants Scheme offers $1,000 to EV owners for purchasing and installing a home charger. Over in the ACT, eligible homeowners can get a zero-interest $2,000–$15,000 loan to buy an EV charger.
There are also federal and state incentives for installing solar batteries, which can make solar EV charging more affordable.
Starting July 1, 2025, the federal Cheaper Home Batteries Program offers up to a 30% reduction in the cost of home solar batteries.
Various states provide additional incentives. For example, New South Wales offers up to $2,400 off the installation cost of a solar battery for homes with existing solar.
Why Choose iStore for Your Home EV Charger?
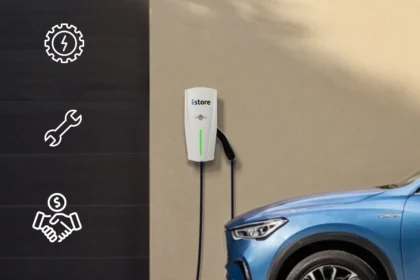
iStore EV chargers have everything you’re looking for in a home charger.
- High Quality: Durable, weather-resistant, and safe, with built-in protection features.
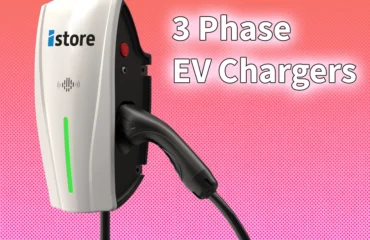
- Different Charging Options: We have a 7.4 kW 230V AC 1-phase model and a 22 kW 400V AC 3-phase model to suit various homes and charging needs.
- Competitive Pricing: Affordable without compromising on performance or safety.
- Smart Charging Technology: You can schedule charging times during off-peak electricity hours, monitor charging sessions, and integrate with your solar system from your smartphone.
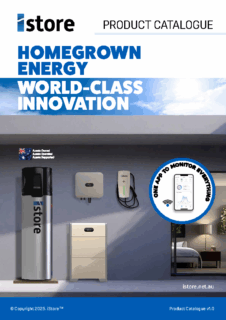
- Integration With Solar Energy Systems: If you have an iStore hybrid inverter and solar battery, your iStore EV charger will seamlessly work with them to maximise energy efficiency and electricity savings.
- Local Customer Support: We’re committed to helping you with installation and maintenance by linking you up with reputable local installers.
FAQs
How Much Does It Cost to Install an EV Charger at Home?
Most EVs come with a free Level 1 charger you can install yourself.
For faster charging, you’ll need a dedicated Level 2 EV charger. These can cost $500–$2,000, with installation costing $700–$1,300.
Can I Install an EV Charger Myself?
You can install a Level 1 charger yourself by plugging it into a standard power point.
A licensed electrician must install a Level 2 charger because it requires a dedicated high-power circuit, wiring into your switchboard, and compliance with Australian electrical safety standards.
What Type of EV Charger Is Best for Home Use?
The best home EV charger is one that suits your driving habits, home power supply, and budget. Many Australian EV owners choose a Level 2 charger for faster, more convenient charging.
Can I Install a Fast EV Charger at Home?
True fast EV chargers, like those at public charging stations, are called DC chargers and aren’t suitable for homes due to their high power needs and infrastructure requirements.
For homes, the fastest charging option is a Level 2 EV charger.
How Long Does It Take to Install a Home EV Charger?
A straightforward Level 2 charger installation usually takes 2–4 hours. In that time, the installer will mount the unit, run the dedicated circuit, wire it into your switchboard, and test everything.
If your home needs a switchboard upgrade, an extensive cable run, or has a three-phase electrical setup, the job can stretch to a full day or even a few days.
Simplify Your EV Charging with iStore
If you want to charge your EV when it suits you, for less cash, and in a way that’s better for the environment, install an EV charger at home.
iStore EV chargers are affordable, high-quality, and long-lasting. And we can hook you up with expert installers in your area.
Contact us today for advice and a quote by calling 1300 515 640 or filling out this online form.


