

How to Connect Battery to Solar Inverter
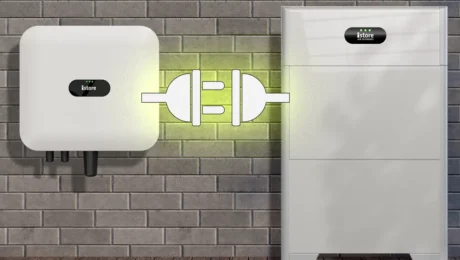
How to Connect a Battery to a Solar Inverter: Clear Instructions and Quality Support
Solar power doesn’t have to stop when the sun goes down. By pairing a battery with a solar inverter, every ray of sunshine can be captured and turned into reliable energy around the clock.
For Aussie households, it means cutting back on rising power bills and keeping the lights on during blackouts. For installers, it’s about delivering smarter, future-ready systems your clients will thank you for.
This guide will walk you through how to connect a battery to a solar inverter, safely and step by step. Along the way, we’ll cover key safety checks and share tips that make the process smoother. Whether you’re upgrading your home or working on a client project, you’ll find the clear, practical advice you need.
What Is a Solar Battery and Inverter?
A solar battery stores the extra electricity solar panels produce during the day. Instead of sending the excess back to the grid, it can be used later when the sun isn’t shining.
A solar inverter converts the direct current (DC) electricity generated by solar panels into alternating current (AC), which is the type of power used in homes and businesses.
When paired together, the inverter manages both the flow of solar energy into the battery and the release of stored energy when needed.
Why Connect a Battery to Your Solar Inverter?
- Backup Power: Stored energy provides security during blackouts, keeping essential appliances running.
- Optimising Energy Use: Extra solar power can be used in the evening and overnight instead of being sent back to the grid.
- Reduced Grid Reliance: Drawing less electricity from the grid means greater independence and stability.
- Energy Savings: Using stored solar instead of buying electricity from the grid helps lower power bills.
- Sustainability: Making full use of renewable solar energy reduces carbon emissions and supports a cleaner future.
iStore’s Solar Batteries and Inverters
At iStore, we offer solar batteries and solar inverters tailored to homes and businesses of different sizes and energy requirements.
Our batteries are made from lithium iron phosphate (LiFePO₄), one of the safest battery materials on the market.
They’re modular in design for flexibility and growth. You can connect up to six modules, scaling storage capacity from 5 kWh to 30 kWh. With this system, a home or business can start small and expand as its energy needs increase.
To complement our batteries, we offer a wide range of hybrid inverters suited to both residential and commercial applications:
- 5kW/6kW Single-Phase Hybrid Inverter: Ideal for standard home installations.
- 10kW Single-Phase Hybrid Inverter: Provides extra capacity for larger households.
- 10kW/15kW/25kW 3-Phase Hybrid Inverter: A strong option for businesses or properties with higher energy demands.
- 5000/6000 3-Phase Hybrid Inverter: Reliable performance for mid-sized commercial systems.
- 29900/40000 3-Phase Inverter: Heavy-duty solutions for large-scale commercial applications.
iStore solar batteries and inverters are built to work seamlessly together. The inverters manage both the charging of the batteries and the flow of stored energy back into the property when needed. This integration creates a smooth, efficient system that maximises solar usage, reduces grid dependence, and provides reliable backup power.
Factors to Consider Before Connecting a Battery to a Solar Inverter
Compatibility
Not all batteries and inverters work together, so compatibility is the first thing to check. The inverter must support the battery type for safe charging, efficient performance, and a longer system lifespan.
Using a hybrid inverter makes this process much simpler. Hybrid inverters are designed with built-in battery compatibility, so they can manage both solar panel input and battery storage without the need for extra components. This makes installation easier for professionals and gives households a system that’s ready for storage from day one.
Battery Size and Capacity
You must match storage capacity with your actual energy needs. A system that’s too small may run out of stored power quickly, while one that’s too large could mean paying for storage that rarely gets used.
- Smaller Households (1–3 people): 5–10 kWh batteries can cover evening use after the sun goes down.
- Larger Households (4+ people): 10–15 kWh batteries can comfortably power appliances and devices into the night.
- Businesses or Commercial Properties: Depending on operating hours and equipment, larger systems of 20 kWh and above can typically handle higher demand and provide reliable backup power.
It’s helpful to look at past electricity bills or monitor daily energy usage to find the most cost-effective battery size. Modular battery systems, like iStore’s, also allow for easy expansion if energy demand grows over time.
Safety Precautions
Safety should always come first when connecting a solar battery to an inverter.
Proper wiring and voltage matching are critical for the system to run smoothly and to prevent damage to equipment. Incorrect connections can lead to overheating, short circuits, or reduced system performance.
Does a Solar Battery Have To Be Professionally Installed?
In Australia, a solar battery must be professionally installed by a licensed electrician who is accredited for battery storage systems.
Here’s why:
- High Voltage Risks: Solar batteries store and discharge large amounts of energy. Incorrect installation can cause electric shock, fire, or system failure.
- Warranty Protection: Most manufacturers, including iStore, require professional installation to keep warranties valid.
- Regulatory Compliance: Australian standards (such as AS/NZS 5139 for battery storage) set strict rules on how and where batteries can be installed. Accredited installers know these requirements and ensure the system is compliant.
- Insurance Coverage: Many home and contents insurers will not cover damage or loss caused by a battery system that was not professionally installed.
Step-by-Step Guide: How to Connect a Battery to a Solar Inverter
If you are a licensed electrician and accredited solar battery installer, here are the general steps to follow to connect a battery to a solar inverter.
- Gather necessary tools and equipment. Have the required cables, connectors, safety gear, and the manufacturer’s installation manual ready before starting.
- Switch off all power sources. Shut down the solar system and isolate the inverter by switching off its AC isolator (disconnecting it from the switchboard) and DC isolator (disconnecting it from the solar panels). Doing this stops electricity from flowing into or out of the inverter during battery installation, preventing electrical hazards.
- Check compatibility. Confirm that the inverter supports the battery type and capacity. Hybrid inverters usually make this step easier with built-in battery compatibility.
- Position the battery. Place the battery in a well-ventilated, dry location away from direct sunlight and extreme temperatures.
- Connect wiring. Use the manufacturer’s instructions to connect the battery cables to the inverter terminals. Pay close attention to polarity, connecting positive (+) and negative (–) cables to the correct terminals, and confirm that all wiring matches the required voltage.
- Secure connections. Tighten terminals and check that all cables are properly insulated and fixed in place to prevent movement or wear.
- Configure the system. Power up the inverter, activate the battery system, and configure settings through the inverter’s monitoring platform or control panel.
- Test the system. Run performance checks to confirm that the battery charges and discharges correctly, and that energy flows seamlessly between the panels, inverter, battery, and household or business supply.
Tips for Safe and Effective Installation
- Review Manufacturer Instructions: Always follow the battery and inverter manuals for correct wiring, communication settings, and configuration.
- Confirm Compatibility: Check that the battery chemistry (e.g., lithium-ion), capacity, and voltage are supported by the inverter.
- Install Protective Devices: Fit isolators, circuit breakers, and fuses rated for the system to safeguard against overloads and faults.
- Use the Right Cable Size: Select cables suitable for the current, voltage, and installation distance to minimise voltage drop and overheating.
- Maintain Correct Polarity: Double-check positive (+) and negative (–) connections before powering on.
- Choose Safe Placement: Position the battery in a cool, dry, and ventilated space, away from direct sunlight, moisture, and flammable materials.
- Follow Australian Standards: Install according to AS/NZS 5139 for battery storage systems and other relevant electrical codes, checking placement requirements, clearances, and fire safety measures.
- Test and Commission Properly: Verify charging and discharging functions, set up monitoring software, and confirm the system operates as intended before handover.
Working with Clean Energy Council–accredited installers brings these safety measures together for a safe, compliant installation. Certified professionals understand how to apply AS/NZS 5139 and other electrical standards, reducing risks and giving households and businesses confidence that their investment meets Australian safety and quality benchmarks.
For iStore systems, this expertise means modular batteries and hybrid inverters integrate seamlessly, warranties remain valid, and the system delivers the performance and longevity it’s designed for.
Common Challenges and Troubleshooting Tips
- Voltage Mismatch: If the battery voltage does not match the inverter’s requirements, the system may not start or could become damaged. Always check specifications before installation.
- Connection Errors: Loose or incorrect wiring, including reversed polarity, can stop the system from operating. Double-check all terminals and cable connections.
- Battery Not Charging: This may be caused by incorrect settings in the inverter, faulty wiring, or insufficient solar input. Reviewing inverter configurations and inspecting cables usually resolves the issue.
- Communication Faults: Some systems require data cables between the battery and inverter. Incorrect or missing connections can prevent the system from reporting or functioning properly.
- Environmental Factors: Extreme heat, poor ventilation, or moisture around the battery can lead to reduced performance or shutdowns. Correct placement helps avoid these issues.
Preventive Tips
- Regularly monitor system performance through the inverter’s app or display.
- Keep firmware and software updated for compatibility and efficiency.
- Inspect wiring and isolators during scheduled maintenance.
- Keep the battery space cool, dry, and well-ventilated to protect performance.
For any issues that can’t be resolved through basic checks, iStore’s support team is available to provide expert troubleshooting and product assistance.
FAQs
How To Connect a Solar Panel Inverter and Battery
To connect a solar panel inverter and battery, a licensed electrician and accredited solar battery installer will
- Turn off all power sources and isolate the inverter using AC and DC isolators.
- Check that the inverter and battery are compatible.
- Position the battery in a safe, ventilated location.
- Connect the battery cables to the inverter, matching positive (+) and negative (–) terminals.
- Secure all wiring with the correct cable size and protective devices.
- Switch the system back on, configure settings, and run performance tests.
Can I Connect Any Battery to a Solar Inverter?
A solar inverter only works with specific battery types, voltages, and capacities. The battery and inverter must be compatible, which is why hybrid inverters and professionally matched systems are recommended.
Do I Need a Hybrid Inverter To Connect a Battery?
A hybrid inverter is the easiest way to connect a battery because it has built-in battery compatibility. With a standard solar inverter, an additional battery inverter or charger is required.
What Type of Battery Is Best for Solar Inverters?
Lithium-ion batteries are the most common and efficient choice for solar inverters. They offer longer lifespans, faster charging, and higher usable capacity compared to lead-acid batteries.
Is It Safe To Install a Solar Battery Myself?
Solar batteries must be installed by a licensed installer in line with Australian standards. DIY installation can create serious safety risks and may void warranties and property insurance.
Is a 10 kW Battery Enough To Run a House?
A 10 kWh battery is often enough to cover evening and overnight use for an average household, but the exact size needed depends on energy consumption, appliances, and lifestyle.
Simplify Your Solar System with iStore’s Battery and Inverter Solutions
Pairing a solar battery with an inverter unlocks the full potential of solar power. It means making better use of the energy collected during the day, cutting down on power bills, and having backup power ready when the grid goes out.
iStore makes this dynamic duo simple with high-quality solar batteries and hybrid inverters that are designed to work together perfectly. They’re built to scale with changing needs, whether it’s for a growing family home or a busy business.
Browse our solar battery and solar inverter ranges today. For expert advice and a quote, get in touch by calling 1300 515 640 or filling out this online form.
If you need help figuring out how to connect a battery to a solar inverter, we can also organise professional installation for you.
Connecting a battery to a solar inverter has never been easier, thanks to iStore!
- Published in General
How Does Heat Pump Hot Water Work

What New Homeowners Need to Know
Imagine cutting down your hot water bills without cutting back on your showers. That’s the promise of heat pump hot water systems, an energy-efficient alternative to traditional electric or gas units that’s quickly gaining traction across Australia.
Instead of burning fuel to generate heat, these clever systems pull warmth from the surrounding air and use it to heat your water. The result? Lower running costs, reduced energy use, and a much smaller carbon footprint.
How does heat pump hot water work? What are the benefits of heat pump systems? And what should you know before deciding if a heat pump is the right choice for your new home? We’ve got all the answers and more.
What Is a Heat Pump Hot Water System?
A heat pump hot water system transfers natural warmth from the air and uses it to heat your water supply, instead of relying on electricity or gas to create heat directly.
At the heart of a heat pump system are three key components.
- Compressor: Increases the pressure and temperature of the refrigerant so it can release heat effectively.
- Evaporator: Absorbs heat from the surrounding air into the refrigerant.
- Condenser: Transfers the captured heat into the water stored in the tank.
Together, these parts work to provide reliable hot water with renewable energy.
How Does a Heat Pump Hot Water System Work?
- The evaporator absorbs heat from the air. A small fan pulls in ambient air, and the evaporator draws out its heat.
- Refrigerant converts the heat into usable energy. The cold refrigerant absorbs the heat, changes into a warm gas, and moves through the system.
- The compressor boosts the temperature. The gas is compressed, its pressure rises, and it becomes very hot.
- Heat transfers to the water in the tank. The hot refrigerant passes through a condenser coil wrapped around, or inside, the tank, releasing heat into the water.
- The cycle resets, ready to repeat. An expansion valve drops the refrigerant’s pressure so it cools back to a liquid, then it returns to the evaporator to start again.
Benefits of Heat Pump Hot Water Systems
Energy Efficiency
Unlike electric water heaters that rely on electricity to directly generate heat, heat pumps only need a small amount of electricity to run the fan and compressor. The real work is done by drawing in natural warmth from the air, which is a free and renewable energy source.
This heating process uses far less power, reducing electricity consumption by around 75–85% compared to traditional electric systems.
Cost Savings
A heat pump may cost more upfront than a standard electric unit, but the long-term savings quickly add up. By using far less electricity to heat water, your energy bills drop month after month. Lower electricity costs mean more money left in the family budget for other priorities.
Over the life of the system, these savings can outweigh the initial purchase and installation costs. In many cases, households can also benefit from government rebates or incentives, making the switch even more affordable.
Eco-Friendly
Heat pump hot water systems are one of the most environmentally friendly ways to heat water. By drawing renewable heat from the air instead of burning gas or using large amounts of electricity, they produce far fewer greenhouse gas emissions.
Switching from a conventional electric water heater to a heat pump can save around 0.3 tonnes of CO₂ per year, while replacing a gas system can save 1–2.9 tonnes annually, depending on the household size and energy use. That’s roughly the same as the emissions from driving 1,000–10,000 km in an average car.
For new homeowners, using a heat pump is a straightforward way to shrink your household’s carbon footprint and make a positive impact on the environment, without compromising on comfort.
Versatility
There are heat pump models to suit homes of all shapes and sizes.
For example, the iStore 180L heat pump is ideal for households of up to 3 people, delivering enough hot water for daily showers, dishwashing, and laundry without unnecessary energy use.
The larger iStore 270L heat pump is designed for medium to large families of 4–6 people, providing reliable hot water even with multiple showers, appliances, and higher daily demand.
With different capacities available, you can choose a system that provides plenty of hot water without wasting energy. This flexibility makes heat pumps a practical option for almost any new homeowner.
Heat Pump Water Heaters vs Traditional Water Heaters
| Feature | Heat Pump Water Heater | Gas Water Heater | Electric Water Heater |
| Energy Efficiency | Uses renewable heat from the air; 3–4x more efficient than electric | Moderate efficiency, but depends on gas prices and supply | Least efficient; relies on electricity to generate heat directly |
| Energy Cost Savings | Households can save $500–$1,000 per year compared to electric systems, depending on household size and tariffs | Cheaper to run than electric, but often 20–40% higher bills than heat pumps | Most expensive; hot water bills can be 3–4x higher than with a heat pump |
| Upfront Cost vs Long-Term Investment | Higher upfront price, but can pay off through energy savings within 3–5 years | Moderate upfront cost; limited long-term savings compared to heat pumps | Lower upfront cost but very high lifetime operating costs |
| Environmental Impact | Low emissions; reduces household CO₂ by 0.3–2.9 tonnes per year, depending on size and energy source | Produces direct greenhouse gas emissions from burning fossil fuels | High emissions if grid electricity is coal-based |
| Versatility | Models available from 180L in size for 1–3 people to 270L+ for 4–6 people | Suitable for small to large households, but efficiency drops with higher demand | Available in various sizes, but costs escalate with larger households |
How Heat Pump Hot Water Systems Work with Solar Panels
Heat pump hot water systems pair seamlessly with solar panels, a solar inverter, and a solar battery.
When solar panels generate electricity during the day, that energy can power the heat pump’s compressor and fan. Instead of drawing electricity from the grid, hot water is heated using clean, renewable energy from the sun.
If you also have a solar battery, the system becomes even more flexible. Excess solar energy captured during the day can be stored in the battery and used later to run the heat pump at night or in the early morning. That means you’re not limited to heating water only while the sun is shining; you can tap into stored energy whenever you need it.
Benefits of Pairing Heat Pumps with Solar Energy
- Lower Energy Bills: Powering your heat pump with solar can reduce or even eliminate hot water costs.
- Smarter Energy Use: Heat pumps can be timed to run during peak solar production hours, making the most of free, renewable power.
- Reduced Grid Reliance: Adding a solar battery means you can enjoy hot water without depending on grid electricity, even in the evenings.
- Minimal Carbon Footprint: Combining a heat pump with solar panels creates one of the cleanest, most sustainable hot water solutions available.
- Future-Proof Investment: With rising energy prices, this setup protects your household from higher running costs down the track.
Installation and Maintenance of Heat Pump Hot Water Systems
Professional Installation: What to Expect
Most heat pump hot water installations take around 3–6 hours, depending on the site and whether an old system needs to be removed. Larger or more complex setups may take a little longer.
A licensed installer will handle the setup for you, but it helps to know the steps involved.
- Site Inspection: The installer will check your home to find the best spot for the heat pump. Proper placement is key. Heat pumps need airflow to draw in ambient heat, so installing them in an open or semi-open space (not in a closed garage or small shed) means maximum efficiency.
- System Positioning: They will place the heat pump unit and storage tank on a stable base, away from confined spaces or areas sensitive to noise.
- Plumbing Connections: They’ll then connect the pipes from the unit to your home’s water supply.
- Electrical Wiring: They’ll connect the system to your home’s power supply, often through a dedicated circuit, which is a separate electrical line and breaker that only serves the heat pump to prevent overloading and improve safety.
- Commissioning and Testing: Finally, the installer will run the system, check water temperature, and ensure everything is operating correctly.
Homeowner Maintenance
Keeping your heat pump in good condition helps extend its life and maintain efficiency. With a bit of care, your heat pump hot water system can deliver reliable, efficient hot water for perhaps 10 years or more.
Here’s what you can do:
- Clear away dust, leaves, and debris from the air intake and fan located on the side or top of the outdoor unit every few months.
- Keep the surrounding space clear, maintaining at least a metre of open space around the unit so air can circulate freely. Avoid storing garden tools, bins, or plants nearby.
- Inspect the system for leaks and strange noises, and report anything unusual to a technician.
- Schedule regular servicing from a professional every 1–2 years. They will check refrigerant levels, electrical components, and overall performance.
Government Rebates and Incentives for Heat Pumps
Federal
The federal Small-Scale Renewable Energy Scheme (SRES) encourages households to install renewable energy systems, such as solar panels and air-source heat pumps.
When you install an eligible system, you’ll receive Small-Scale Technology Certificates (STCs). These certificates have monetary value, and you can sell them to energy retailers or other liable entities who need them to meet their renewable energy obligations under the scheme.
You can apply the value of these STCs as an upfront discount toward the cost of installing your heat pump system, effectively reducing the purchase price.
The number of STCs you receive depends on several factors. Larger, more efficient systems in sunnier areas or homes that use a lot of energy to heat water will typically qualify for more STCs.
This scheme is reducing until it ends in 2030, so the amount you can save on your heat pump installation will decrease over time.
State
The NSW Government helps households save money on energy by offering incentives to upgrade to energy-efficient appliances and equipment. The incentive works as a discount taken off your quote for the installation of a heat pump hot water system.
If eligible, you can receive a discount of up to $640 when you replace an electric water heater with an air source heat pump. When you replace a gas water heater, you can receive a discount of up to $330.
In Victoria, eligible households can receive a discount of up to $630 for replacing an inefficient electric hot water system with a heat pump and up to $560 for replacing an inefficient gas water heater.
To find out what rebates or incentives apply in your state, visit your state government’s energy website or check the federal government’s energy.gov.au site, which lists current programs across Australia. You can also ask your installer, as many are registered providers under these schemes and can confirm eligibility and apply the discount directly to your quote.
Eligibility and the Application Process: What You Need to Do
- Choose an Eligible Heat Pump: Your heat pump must be an approved model (e.g., iStore) on the Australian Government Clean Energy Regulator Register and must have a capacity under 425 litres to qualify for STCs.
- Choose a Retailer and Licensed Installer: Choose a reputable retailer and confirm the installer holds the correct state or territory licence with your local authority.
- Decide on Using a Registered Agent: Most households assign STCs to an agent, who calculates their value and applies it as an upfront discount. You can find agents in the REC Registry.
- Install Your Heat Pump: Have the system professionally installed.
- Create and Register STCs (if not using an agent): Set up an account in the REC Registry and lodge your application for STCs within 12 months of your heat pump installation. Upload the documents required by the Registry. Allow 4–6 weeks for validation and registration.
How Can I Choose the Right Heat Pump for My Home?
Choosing the right heat pump hot water system comes down to matching your household’s needs with the right size and setup.
Here are some practical tips.
- Consider your household’s size and hot water usage. A 180L system suits 1–3 people, while a 270L or larger model is better for families of 4–6.
- Consider your climate. Most heat pumps work well across Australia, but in cooler regions, look for models specifically designed for low ambient temperatures.
- Look at energy ratings. Higher efficiency ratings mean bigger savings on bills over time.
- Think about installation space. Heat pumps need good airflow, so choose an outdoor or well-ventilated location with clearance around the unit.
- Plan for solar integration. If you have solar panels, make sure your heat pump can be timed to run during the day to maximise free energy use.
- Check rebates and incentives. Federal and state government programs may reduce your upfront costs, making the system more affordable.
- Compare warranties and support. Longer warranties and responsive after-sales service give peace of mind and protect your investment.
FAQs
How Does a Heat Pump Hot Water Heater Work?
A heat pump water heater draws heat from the surrounding air and transfers it into water stored in a tank. A refrigerant absorbs the heat, a compressor boosts its temperature, and a condenser coil releases that heat into the water, providing hot water using far less electricity than traditional systems.
Are Heat Pump Water Heaters Worth It?
While heat pump water heaters cost more upfront, they can cut hot water energy use by up to 75%, lowering bills and emissions. Over time, the savings on running costs and available rebates usually outweigh the initial investment.
How Much Energy Does a Heat Pump Hot Water System Save?
On average, a heat pump hot water system uses 60–75% less electricity than a conventional electric water heater. Households can save around 2,000–3,000 kWh of electricity per year, depending on household size, climate, and hot water demand.
Can Heat Pumps Work in Cold Climates?
Modern heat pumps are designed to work efficiently in cold climates, often down to around -5°C to -10°C. However, their efficiency is higher in warmer conditions, so performance and running costs may vary with the climate.
What Is the Lifespan of a Heat Pump?
A heat pump typically lasts 10–15 years with proper installation and regular maintenance.
Upgrade to an Energy-Efficient Future with iStore Heat Pumps
How does heat pump hot water work to lower your water heating bills and carbon footprint?
Instead of burning through electricity or gas, it cleverly draws warmth from free, abundant air to heat your water. It’s comfort that costs less and cares for the planet.
At iStore, we’ve been supplying heat pumps to Australian homes for over 25 years. They’re high-quality, affordable, and reliable.
Explore our heat pumps online today, then contact us for a quote and help organising installation. Call 1300 515 640 or fill out this online form, and we’ll be in touch soon.
We can also help you if you’re thinking of switching to solar for even more savings and sustainability.
- Published in General
What is Solar Battery Storage? Ensure Safety, Sustainability, and Cost Savings
Solar isn’t just about generating electricity anymore; it’s about keeping that energy in your hands.
For Australian households and businesses, solar battery storage is becoming the key to true energy independence. By storing the power solar systems produce during the day, you can rely less on the grid, cut down on energy bills, and enjoy peace of mind when demand spikes or outages hit.
What is solar battery storage? What benefits do solar batteries deliver in terms of cost savings, safety, and sustainability? We’ve got the answers you need before deciding if a solar battery is a smart move for your home or business.
What is Solar Battery Storage and How Does it Work?
A solar battery stores the excess energy solar panels produce during the day. Instead of sending that unused electricity back to the grid, the battery holds onto it so you can use it later at night, on cloudy days, or during a blackout.
Here’s how it works:
- Solar panels generate power when the sun is shining.
- Your home or business uses the power it needs first.
- Any extra energy is stored in the battery instead of being exported to the grid.
- The battery discharges stored energy when your panels aren’t producing enough to meet demand.
Benefits of Solar Battery Storage for Homes and Businesses
- Energy Independence: Reduce reliance on the grid and take control of how and when you use solar power.
- Cost Savings: Store excess solar energy to use during peak tariff times, helping to cut electricity bills.
- Backup Power: Keep the lights on and appliances running during blackouts or grid disruptions.
- Sustainability: Maximise your use of renewable energy and reduce your carbon footprint.
- Improved Corporate Responsibility (Businesses): Strengthen your green credentials, meet ESG targets, and demonstrate your commitment to a cleaner future to customers and stakeholders.
- Greater Return on Investment: Get more value from your solar system by using more of the energy you generate.
- Future-Readiness: Prepare for changes in electricity prices and grid policies by having your own energy supply.
Key Features of iStore Solar Batteries
Safety
iStore solar batteries include four layers of built-in protection, covering
- Overcharge: Prevents the battery from being charged beyond its capacity, which could cause damage or overheating.
- Over-Discharge: Stops the battery from being drained too far, which protects the cells from permanent damage and extends lifespan.
- Short Circuit: Cuts off power if a fault occurs, avoiding sudden surges of current.
- Temperature Control: Maintains safe operating temperatures, reducing the risk of overheating.
On top of this, iStore batteries use lithium iron phosphate (LiFePO₄) chemistry, known for its stability and durability. Unlike other lithium options, LiFePO₄ is far less prone to overheating, which makes it one of the safest batteries on the market.
These batteries also have a longer cycle life, meaning you can count on consistent performance for years to come.
Flexibility
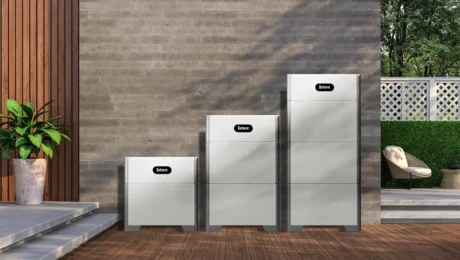
iStore solar batteries are modular in design. They come in stackable 5 kWh modules. You can connect up to six modules, scaling from 5 kWh for essential appliances to 30 kWh of storage for whole-home or commercial use.
This flexibility allows you to tailor the system to your current budget while keeping the option open to expand in the future, whether that’s running more of your home on solar or supporting a growing business operation.
Seamless Integration
Our batteries work hand in hand with our solar inverters, creating a complete, all-in-one energy system. The battery stores the excess electricity your solar panels generate, while the inverter manages the flow of power between the panels, the battery, and your home or business.
Because of this compatibility, installation is straightforward and performance is optimised. You get a smooth, reliable system that makes the most of your solar investment, without the hassle of mismatched components.
Smart Monitoring
With iStore’s WLAN dongle and smart logger, you can keep track of your energy system in real time. The WLAN dongle connects your solar battery to your home or business network, while the smart logger gathers and displays detailed performance data.
This setup lets you monitor how much energy your panels are producing, how much is being stored, and when the battery is supplying power. You can access this information remotely, giving you greater control and the ability to fine-tune usage for maximum efficiency and savings.
Strong Warranties
At iStore, we offer a 10-year warranty on our solar batteries, as well as a strong support network, giving you protection for your investment and peace of mind.
Factors to Consider When Choosing a Solar Battery
- Capacity and Size: Solar batteries are measured in kilowatt-hours (kWh). A smaller home may only need 5–10 kWh to cover essentials like lights and appliances, while larger homes or businesses might benefit from 20–30+ kWh for broader coverage.
- Energy Needs: Think about your average energy use, peak demand times, and whether you plan to add more solar panels or appliances later.
- Compatibility: Not every battery works with every inverter. Make sure your chosen battery integrates smoothly with your solar inverter for efficient energy management.
- Safety: Look for batteries that use proven, stable materials such as lithium iron phosphate (LiFePO₄), which offers excellent safety, durability, and long life.
- Warranty and Support: A solar battery is a long-term investment, so solid warranties and responsive customer support matter.
FAQs
What Does a Solar Battery Do?
A solar battery stores the excess electricity solar panels generate during the day for use later at night, during cloudy weather, or in a blackout. This storage helps lower reliance on the grid, reduce power bills, and keep the energy supply more reliable.
How Long Does Solar Battery Storage Last?
The stored energy in a solar battery can last anywhere from a few hours to overnight, depending on
- Battery Capacity (kWh): For example, a 10 kWh battery could run an average household’s evening use for about 8–12 hours.
- Energy Consumption: Higher loads, such as air conditioning or pool pumps, will drain the battery faster.
- System Size: Larger batteries (20–30+ kWh) can supply power for much longer periods.
What Is the Difference Between Solar Panels and Solar Batteries?
Solar panels generate electricity from sunlight, while solar batteries store any excess energy for later use.
How Much Energy Can a Solar Battery Store?
Solar battery storage is measured in kilowatt-hours (kWh). Smaller units start around 5 kWh, which is enough for basic household needs, while larger systems can store 20–30+ kWh to power most of a home or support business operations.
What Is the Cost of a Solar Storage Battery?
Solar storage batteries generally cost $3,300–$7,000 for smaller 5 kWh systems and $9,900–$16,000+ for larger 10–15 kWh units, with prices varying by size, brand, and installation needs.
Make the Most of Solar Energy with iStore Solar Batteries
What is solar battery storage?
Think of it as your own personal power bank for the sun. Instead of letting unused energy slip away, you keep it on hand for after dark, on cloudy days, or if the grid goes down.
For safer, more sustainable, and more affordable energy usage, you need an iStore solar battery. If one isn’t enough, our innovative modular battery system means you can start small and expand as your needs grow.
Talk to an iStore expert today to find the perfect battery size for your home or business. Browse our solar battery range, then get in touch by calling 1300 515 640 or filling out this online form.
- Published in General
Solar Rebate for Business: Australian Advantage
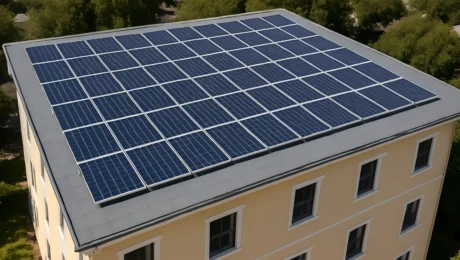
Across Australia, more and more businesses are switching to solar to cut their costs, reduce their carbon footprints, and future-proof their operations.
The financial support available through solar rebates is helping drive this surge towards solar energy.
How can you take advantage of a solar rebate for business to make solar more affordable?
We’re here to answer that question. We’ll also show you how our tailored solar solutions can help you unlock long-term savings while doing your part to contribute to a cleaner Australia.
What Is the Solar Rebate for Australian Businesses?
The federal solar rebate for businesses is available through the Small-Scale Renewable Energy Scheme (SRES). The Australian Government introduced this initiative to encourage investment in clean energy by lowering the upfront cost of installing solar systems.
Instead of receiving a direct cash rebate, your business earns Small-Scale Technology Certificates (STCs) when you install eligible solar panels and inverters. Each STC represents a set amount of renewable energy your system is expected to generate over its lifetime.
These certificates have a market value and can be sold through your solar installer, who will apply the discount to the cost of your installation.
State-Level Solar Rebates For Business
Some state-based solar rebates for businesses are also available.
The solar rebate for businesses in NSW is currently called the Solar Battery VPP Incentive. This incentive offers up to $1,500 to small businesses that install an eligible solar battery and connect it to a Virtual Power Plant.
In South Australia, the Powering Business Grant offers eligible businesses funding of $2,500–$75,000 to purchase solar batteries and solar panels paired with a battery storage system.
Benefits of Solar Rebates for Businesses
- Upfront Cost Savings: Solar rebates reduce the initial investment needed for a system, making it easier for your business to switch to renewable energy.
- Long-Term Cost Savings: With a lower installation price and reduced reliance on the grid, your business can benefit from ongoing savings on electricity bills.
- Environmental Impact: Installing solar panels helps reduce greenhouse gas emissions and supports your business’s commitment to sustainability, which can also enhance your brand reputation.
- Energy Independence: Generating your own clean power reduces exposure to rising energy prices and supply disruptions, giving your business more control over energy use.
- Tax Incentives: Your business may be eligible for tax deductions or depreciation benefits on solar systems, improving the overall return on investment.
Eligibility Requirements for Solar Rebates
To access the Small-Scale Renewable Energy Scheme (SRES), your business needs to install an eligible solar PV system under 100 kW in size with an annual electricity output of less than 250 MWh. The system must use approved products and be installed by a Clean Energy Council–accredited installer.
The number of Small-Scale Technology Certificates (STCs) your business receives depends on
- Installation date
- Geographical location
- Amount of electricity generated
- Solar battery capacity
- How you choose to create your certificates: each year, every five years, or all at once for the full deeming period upfront
For state-based solar rebates, eligibility requirements differ depending on the program. In most cases, your business must operate from a commercial premises in that state or territory, use accredited products and installers, and meet certain conditions such as business size, energy use, or co-funding contributions.
To check whether your business qualifies for federal or state rebates, head to your state or territory government’s official energy website. You can also speak with a Clean Energy Council–accredited solar installer, who can explain what incentives apply to your business and manage the rebate process for you.
How to Maximise Solar Rebate Benefits for Your Business
Choose the Right System Size
iStore’s diverse range of inverters caters to all businesses, no matter their size or energy needs.
- 10kW Hybrid Inverter Single-Phase: This inverter balances performance with affordability. It’s suited to smaller businesses such as cafés, retail shops, or small offices.
- 5kW or 6kW Hybrid Inverter 3-Phase: Either is a smart choice for medium-sized businesses with higher energy demands, like workshops or commercial kitchens, without requiring excessive investment.
- 10kW, 15kW, or 25kW Inverters 3-Phase: Reliable options for larger operations with greater power needs, including warehouses, manufacturing facilities, or bigger office spaces.
- 29kW or 40kW Inverter 3-Phase: These models deliver consistent performance across multiple facilities or businesses with heavy, round-the-clock energy usage.
Work with Certified Installers
To qualify for solar rebates, your system must be installed by a Clean Energy Council (CEC)–accredited installer using approved products. Professional installation guarantees your business meets all rebate requirements and the system is fitted safely.
Working with certified installers also saves you time and stress, as they usually handle the paperwork and certificate creation on your behalf.
Combine with Solar Batteries
Pairing solar panels with solar batteries enables your business to store excess solar power for peak demand periods, reduce grid reliance, and further boost long-term savings, while unlocking additional value from battery rebates.
iStore’s solar batteries come in stackable 5 kWh modules, letting you connect up to six modules and scale from 5 kWh to 30 kWh of storage. You can start with the storage you need now and expand over time as your business’s energy use grows.
Monitor Energy Usage
Keeping track of how your system performs is key to maximising savings and rebate value.
iStore’s WLAN dongle and smart logger give real-time insights into your business’s energy generation and consumption. By monitoring usage, you can identify patterns, optimise performance, and make sure your system is delivering the returns you expect.
FAQs
How Much Can a Business Save With Solar Rebates in Australia?
Installing solar through the Small‑Scale Renewable Energy Scheme can slash the system’s price by 25%–30%.
Are Solar Rebates Available for Small Businesses?
The current Small‑Scale Renewable Energy Scheme is the best solar rebate for small businesses. It offers discounts through Small‑Scale Technology Certificates, significantly lowering the upfront costs of installing solar systems for businesses.
Starting 1 July 2025, the Cheaper Home Batteries Program also expands to small businesses, providing around a 30% discount on eligible solar battery storage systems.
What Is the Small-Scale Renewable Energy Scheme (SRES)?
The Small-Scale Renewable Energy Scheme is a federal program that reduces the upfront cost of installing solar systems with a capacity of under 100 kW. When a business installs an eligible system, it earns Small-Scale Technology Certificates, which have a market value and are usually applied as an upfront discount by the installer.
How Do I Apply for a Solar Rebate for My Business?
When your business installs solar panels or batteries through a Clean Energy Council–accredited installer, the installer applies for the federal rebate on your behalf. This includes claiming Small‑Scale Technology Certificates, which appear as a discount on your quote at the point of sale.
Take Advantage of Solar Rebates for Business with iStore
With the right rebates and the right system, your business won’t just save, it will thrive. Let iStore power your path to smarter, cleaner energy.
Explore iStore’s commercial solar inverters and solar batteries today and take the first step towards energy savings and sustainability.
After browsing our range, call 1300 515 640 or complete this online form. We’ll answer your questions, give you a quote, and help organise installation.
- Published in General
What Size Solar Battery Do I Need? Clear Purchasing Information for New Homeowners
Ever wondered why your solar panels pump out all that energy during the day, but you’re still paying the power company at night? The missing piece is a solar battery.
Solar panels only generate power while the sun is shining. Without a solar battery, any unused energy gets sent back to the grid instead of being saved for when you need it, like cooking dinner or binge-watching Netflix after dark.
The big question is: “What size solar battery do I need?” Pick too small, and you’ll run out of juice. Go too big, and you’ll overspend.
Let’s look at what you should consider when buying a solar battery so you know exactly what size battery will work for your home.
Why Is Choosing the Right Solar Battery Size Important?
If your solar battery is too small, it won’t hold enough energy to cover your evening use. You’ll be left relying on grid electricity that’s expensive and generated mainly from non-renewable fossil fuels.
On the other hand, a battery that’s too large means you’ve paid for storage you rarely, if ever, fill, which is an unnecessary hit to your budget.
So how do you figure out “What size solar battery do I need for my house?” Consider the following factors.
Factors to Consider When Sizing Your Solar Battery
Daily Energy Usage
Start by calculating your home’s average daily electricity use. Knowing your usage means you can choose a solar battery that matches your energy needs.
Check your electricity bill. It usually lists your total energy use over a billing period. Divide that by the number of days to get your daily average. Alternatively, note the reading on your meter at the same time on two consecutive days, then subtract to find the kWh used in 24 hours.
For reference, here are some typical household energy usage figures:
- Small Households (1–2 people): 8–17 kWh/day
- Medium Households (3 people): 18–20 kWh/day
- Large Households (4–5+ people): 21–25 kWh/day or more
Solar Panel Capacity
Solar panels set the limit for how much energy you can produce and store each day. A larger 6–10 kW system can generate far more electricity than a smaller 3 kW system, giving you more excess energy to put into a battery.
The efficiency of your panels also matters, since higher-efficiency models produce more power from the same amount of sunlight.
Panel placement affects how efficiently your system performs. If your roof is partly shaded or panels face away from the sun, your overall output will be lower, which means the battery may not charge to full capacity. In this case, installing a large battery won’t deliver value, because the panels can’t generate enough power to fill it.
Usage Goals
Your reasons for installing a solar battery will strongly influence the size you need.
- Backup Power: If your main goal is backup power during blackouts, you may only need a smaller battery that can power essentials like lights, Wi-Fi, and the fridge. A larger battery would be necessary if you want to keep high-demand appliances, such as air conditioning, running as well.
- Off-Grid Living: If your home is not connected to the grid, you’ll need enough storage to cover all your daily energy needs, plus extra capacity for cloudy days.
- Reducing Energy Bills: If your focus is on saving money rather than complete energy independence, a mid-sized battery is often enough. It can store daytime solar energy for use in the evening, helping you avoid buying expensive grid power during peak hours.
Location and Climate
Where you live has a big impact on how much solar energy your panels can produce and how large a battery you need.
Homes in sunny regions generate more solar power, so a smaller battery may be enough to store the excess energy. Cooler or cloudier regions get fewer peak sun hours, which means you may want a larger battery to store extra energy when it’s available.
These are the average peak sun hours per day across major Australian cities:
| City | Average Peak Sun Hours per Day (Approx.) |
| Brisbane | 5.6 hours |
| Sydney | 5.3 hours |
| Melbourne | 4.7 hours |
| Tasmania | 3.5 hours |
| Adelaide | 5.3 hours |
| Perth | 6.0 hours |
| Northern Territory | 6.5 hours |
Seasonal changes also play a role. Households in southern states often use more electricity in winter for heating, while northern states may have higher summer demand from air conditioning.
Future Energy Needs
When choosing a solar battery, consider how your energy needs may grow in the future. Factoring in future changes helps you avoid needing an upgrade a few years down the track.
If you plan to have more people living under your roof, expect higher energy demand from extra appliances, heating, cooling, and day-to-day living.
If you plan to get an electric vehicle, this can significantly increase your electricity use. Charging can require 6–12 kWh per night, depending on the car and driving habits.
Common Solar Battery Sizes and Their Uses
- 5 kWh: Suited to smaller households or those wanting minimal essential power backup during power outages.
- 10 kWh: Storing enough solar power to cover evening use and reduce reliance on grid electricity.
- 15 kWh+: Ideal for larger families, homes with high-demand appliances, or those considering partial or full off-grid living.
Benefits of Modular Solar Battery Systems
Many solar batteries are modular, which means you can start small and add more capacity as your energy needs grow.
For example, iStore solar batteries come in stackable 5 kWh modules. You can connect up to six modules, giving you flexibility to scale from 5 kWh to 30 kWh of storage.
How to Calculate the Right Solar Battery Size for Your Home
Here’s a simple guide to figure out “What size solar battery do I need for my house?”
- Calculate your daily energy use. Check your electricity bill or meter to see how many kilowatt-hours (kWh) your household uses on average each day.
- Decide how much of that you want covered. Do you just want to reduce your evening bills, keep the lights and fridge on during blackouts, or aim for full coverage? Your goal will determine how much storage you need.
- Factor in your solar panel output. The size and efficiency of your solar system, along with peak sun hours in your area, affect how much energy you can generate to charge your battery.
Simple calculation:
Take your average daily energy use and multiply it by the percentage you want the battery to cover.
For example:
- Daily energy use = 20 kWh
- Desired coverage = 75% (0.75)
- 20 × 0.75 = 15 kWh battery
Still unsure? You don’t have to crunch the numbers alone! iStore’s solar battery experts can calculate the right size for your home and recommend a system that fits your budget and future energy goals.
FAQs
How Do I Know What Size Solar Battery I Need?
The right solar battery size depends on your daily energy use, how much of that you want to cover, and the output of your solar panels.
A quick way to estimate is to multiply your average daily usage (in kWh) by the percentage you want stored.
Is a 10kWh Battery Enough for My Home?
A 10 kWh battery suits most medium-sized homes, as it can store enough energy to cover typical evening use and reduce reliance on grid power. For example, a 10 kWh battery can run essentials like lights, a fridge, Wi-Fi, and a TV, plus a few hours of air conditioning or other appliances.
What Factors Affect Solar Battery Capacity?
Solar battery capacity is influenced by daily energy use, the size and efficiency of solar panels, peak sun hours, and usage goals, whether that’s backup power, bill savings, or going off-grid. Adding more people to the household or charging an EV can also affect battery size.
Can I Add More Battery Capacity to My Solar System Later? </h3>
Many modern solar batteries are modular, so you can start small and add more capacity later as your energy needs grow. Just make sure your solar system and inverter are compatible with expansion.
Find the Perfect Solar Battery Size with iStore
Still asking yourself, “What size solar battery do I need for my house?”
iStore makes the answer simple. Our modular battery systems let you start with a compact 5 kWh unit and expand all the way to 30 kWh as your household grows or your energy needs change. Each module is lightweight, stackable, and designed to fit seamlessly into Aussie homes.
Talk to an iStore expert today to find the perfect battery size for your home. Browse our solar battery range, then get in touch by calling 1300 515 640 or filling out this online form.
- Published in General
Why iStore Heat Pumps Are Leading the Market
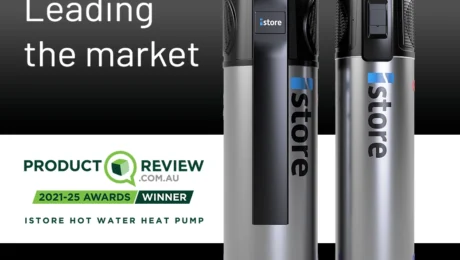
When it comes to energy-efficient hot water solutions, not all heat pumps are created equal. iStore has built its reputation as a market leader in Australia by delivering products that outperform the competition in performance, recovery rate, customer service, and long-term reliability. With over 15 years of expertise in the energy sector, iStore continues to set the benchmark for quality and innovation.
Superior Performance & Efficiency
iStore heat pumps are designed with advanced technology to maximize efficiency while minimizing energy consumption. By harnessing renewable energy from the air, they provide hot water at a fraction of the running cost of traditional systems. Independent tests and real-world feedback consistently show that iStore heat pumps deliver industry-leading performance, ensuring reliable hot water even in challenging climates.
Fast Recovery Rate – Hot Water When You Need It
One of the standout features of the iStore heat pump is its impressive recovery rate. Unlike many standard heat pumps that struggle to meet household demand, iStore systems are engineered to quickly replenish hot water, making them perfect for busy families. Whether it’s back-to-back showers or heavy daily usage, iStore ensures there’s always enough hot water on hand.
Industry-Leading Warranty & Peace of Mind
Choosing a hot water system is a long-term investment, and iStore backs their products with one of the strongest warranties in the industry. This commitment to durability and customer confidence means homeowners can trust that their iStore system is built to last, with reliable performance for years to come.
Exceptional After-Sales Service
What truly sets iStore apart is not just the product, but the people behind it. With a dedicated support team and a national network of installers, iStore prides itself on delivering outstanding after-sales service. From installation to ongoing support, customers enjoy a seamless experience that ensures maximum value from their investment.
Setting the Benchmark in Hot Water Technology
While many heat pumps on the market focus on being the cheapest, iStore has deliberately focused on quality, reliability, and innovation. By combining advanced engineering with superior customer support, iStore continues to raise the standard for hot water solutions in Australia.
In short: Performance, recovery, service, and warranty—this is what makes iStore the clear market leader in heat pump technology.
- Published in General
Best EV Chargers for Home & Business – Comparison & Reviews
You’ve bought an electric vehicle. Bet you’re feeling pretty good about skipping the petrol station! But if you’re now stuck waiting in line at a public charging station, it’s a bit of a letdown, right?
The answer? An EV charger installed at your home or business.
Choosing the right EV charger can be overwhelming. Heaps of options. Confusing specs. And no clear answer on what suits your home, your business, or your daily driving routine.
This EV charger comparison guide cuts through the noise. We’ve compared top EV charger models to reveal the best EV charger with the speed, features, and value you need.
Why Choosing the Right EV Charger Matters
Choosing the right EV charger will make your life easier. You can charge faster, avoid long waits at public stations, and schedule charging during off-peak times when electricity rates are cheaper to save money.
Smart chargers come with built-in features like energy tracking, remote access via an app, and automatic scheduling, so you’re in complete control wherever you are.
Certain chargers are designed to work with certain setups. For example, some are made for homes with standard single-phase power, while others support faster charging through three-phase connections. If you have solar panels, you’ll want a charger that can sync with your solar system and charge your EV using excess solar energy.
With a smart charger, you can take this a step further, automatically prioritising solar power, tracking how much energy you’re using, and adjusting charging times to lower costs and reduce your reliance on the grid.
And don’t forget compatibility. Not every charger suits every EV model, so it’s important to pick one that’s a good match for your car and your home or business power supply. A little research now means fewer headaches later and more reliable charging every time you plug in.
Types of EV Chargers – A Quick Overview
Level 1 Chargers
Level 1 chargers are the most basic charger type and usually come included with your EV. They plug into a standard 240-volt (V) household power point and deliver around 2.4 kW of power.
That translates to slow charging. You’re looking at around 14–24+ hours for a full charge, depending on your vehicle. It’s enough to top up overnight if you don’t drive far each day, but it’s not ideal for regular use or EVs with larger batteries.
These chargers are simple, portable, and cost nothing extra upfront. But if you want faster, smarter, or solar-compatible charging, you’ll likely outgrow a Level 1 charger quickly.
Level 2 Chargers
Level 2 chargers are the most popular choice for home and business use. They need to be hardwired or plugged into a dedicated circuit, usually using a 7 kW (single-phase) or 22 kW (three-phase) setup.
Charging is much faster than with a Level 1 charger. You can expect a full charge in 4–10 hours, depending on your EV and your power supply. They’re ideal for complete overnight charging or topping up during the day.
Many Level 2 chargers come with smart features like Wi-Fi connectivity, energy monitoring, scheduling, and solar integration. They’re compatible with most EV models and offer a more reliable, long-term solution for regular charging at home or work.
DC Fast Chargers
Most homes and businesses supply AC (alternating current), which needs to be converted to DC (direct current) because EV batteries only use DC power. With a Level 1 or 2 charger, the current is converted inside the car using its onboard inverter. With a DC fast charger, this conversion happens inside the charger.
This process speeds up charging, making DC fast chargers the fastest type of charger.
They offer high power output, typically ranging from 25 kW to 350 kW. Lower-powered models (around 25–50 kW) can give you a decent top-up in under an hour. Higher-powered units (150–350 kW) can charge some EVs from 10% to 80% in just 20–60 minutes, depending on the car’s battery capacity and charging capability.
DC fast chargers are used at commercial sites, fleet depots, and public charging stations. They’re more expensive to buy and install, and generally require three-phase power, advanced electrical infrastructure, and council approval. Most homes won’t support them, but for businesses, they’re a game-changer for fast charging turnaround.
Single-Phase vs Three-Phase EV Chargers
What power supply does your home or business have: single-phase or three-phase? The answer will affect the EV charger you choose. The terms refer to how electricity flows into your home or business.
Most homes in Australia have single-phase power. It’s suitable for everyday appliances and supports EV chargers up to around 7.4 kW. Three-phase power is more common in commercial buildings or large properties and can support higher-capacity chargers, up to 22 kW or more.
The main difference between single-phase and three-phase charging is speed. With single-phase, a typical charger will add about 25–40 km of range per hour, depending on your EV. With three-phase, charging speeds can jump to around 60–100+ km of range per hour.
In terms of cost, single-phase chargers are generally cheaper to install and more than enough for most home users. Three-phase chargers and the required wiring cost more but are faster and better suited for heavier daily use, such as in businesses, workplaces, or apartment blocks.
Still unsure? A licensed electrician can confirm your home or business’ power supply and determine if any upgrades are needed for three-phase charging.
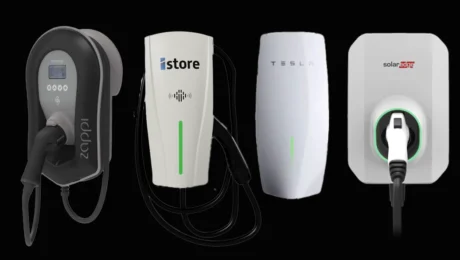
Commercial and Home EV Charger Comparison Table: Top 5 Models
| Charger Model | Power Output | Approx. Charging Speed (Full Battery) | Approx. Range Added | Features | Pros | Cons |
| iStore | 7.4 kW (single-phase) / 22 kW (three-phase) | 6–10 hrs at 7.4 kW and 2–4 hrs at 22 kW | 10–15 km/hr (7.4 kW) and 30–120 km/hr (22 kW) | App control, works with solar, balances power use, 3-year warranty | Scheduled charging, strong safety features (including internal overheating sensors), long cable included | None! |
| Zappi | 7 kW / 22 kW | 3–9 hrs | 40–100km/hr | Designed and made in the UK with an Australian office and support, OCPP compatible (can take advantage of third-party software applications) | Great for solar homes and businesses, lots of charging modes, eco-friendly features | More expensive than other chargers on the market |
| Evnex | 7.4 kW / 22 kW | 3–10 hrs | 50–120 km/hr | Local company with products manufactured in New Zealand, adjusts charging based on power use | Integrates with any solar system, easy to operate, one of the only models that comes with a built-in 4G SIM, making installation and connection straightforward | No option for an untethered single-phase residential charger (there is an untethered commercial single-phase charger), cannot connect to third-party apps |
| Ocular | Single phase / Three-phase | 6–8 hrs | 40–140 km/hr | Adjustable charging speeds, built-in Wi-Fi for remote monitoring, smartphone app control | Simple and affordable, charging control and tracking | No built-in display, not compatible with solar |
| Tesla Gen 3 | Single phase / Three-phase | 5–13 hrs | 38–60 km/hr | Wi-Fi connection, app control, customisable faceplate colour | One of the cheapest chargers on the market, extra-long cable, durable against environmental conditions | No Open Charge Point Protocol (OCPP), which allows chargers to communicate with charging management software, regardless of brand, no load balancing capability, no LCD screen to display charging status |
Key Features To Look For in an EV Charger
When choosing an EV charger, it’s not just about speed.
Here are the key features to keep in mind.
- Durability: Look for a charger that can handle Australian conditions—heat, rain, and everything in between. For outdoor setups, weatherproof casing is essential.
- Compatibility: Make sure the charger works with your EV model and your power setup (single-phase, three-phase, or solar). Also, consider how you want to connect the charger to your car; some are tethered, with a cable attached, while others are untethered, so you’ll need to use the charging cable that came with your EV and plug it into the charger each time.
- Integration with Solar Systems: If you have solar panels, pick a charger that can sync with your system. The best ones let you prioritise solar power, helping you save money and reduce grid reliance.
- Smart Capabilities: Many chargers now come with apps that let you schedule charging during off-peak hours, monitor energy use, or receive software updates automatically. Some also support load management to avoid overloading your home or business’ power.
- High Capacity for Multiple Vehicles: If you’re running a fleet or offering public charging, look for chargers that can support multiple vehicles at once or work together using power-sharing features.
- Payment Integration: For customer use, choose a charger with built-in or add-on payment options like RFID cards, tap-and-go, or mobile apps. These make charging simple and trackable.
- Warranty and Support: A solid warranty (ideally 3 years or more) gives peace of mind. Also, check that the brand offers local support and installer access if something goes wrong.
FAQs
What Are the Best EV Chargers on the Market?
The best EV charger is one that is reliable, compatible with your vehicle, and suitable for your power setup: single-phase, three-phase, or solar. It should offer smart features like app control, scheduled charging, and energy monitoring, and be designed to handle Australian climate conditions.
For businesses, top choices also include options for multiple vehicles, user access control, and payment systems. The right choice depends on your specific needs, budget, and location.
How Do Level 1 and Level 2 EV Chargers Compare?
Level 1 chargers plug into a regular power point and are slow, taking up to 24 hours for a full charge. Level 2 chargers use a dedicated circuit and are much faster, usually charging a car in 4 to 10 hours.
What’s the Difference Between Single-Phase and Three-Phase EV Chargers?
Single-phase chargers are common in most homes and offer charging speeds up to 7.4 kW. Three-phase chargers are faster—up to 22 kW—and are often used in businesses or larger properties with three-phase power.
The main difference between these chargers is how quickly they can charge an EV: around 4–10 hours with single-phase compared to 2–4 hours with three-phase, depending on the vehicle’s battery size.
Do Faster EV Chargers Cost More?
Yes, faster EV chargers generally cost more. Higher charging speeds require more advanced hardware, and installation can be more complex, especially for three-phase or DC fast chargers. However, the extra cost can be worth it for quicker charging and better convenience.
Choose the Perfect EV Charger with iStore
We’re sure our EV charger comparisons have given you food for thought and a jumping off point. But no doubt, you still have questions about which EV charger will be best for your specific circumstances.
iStore is here to help!
Our EV charger experts can answer your questions, point you in the right direction, and provide you with a quote.
We supply two EV charger models to suit various charging needs.
- 7.4 kW 230 V AC 1-Phase EV Charger: Offers overnight charging using a standard single-phase power supply. Ideal for everyday EV use and suits most Australian household energy setups.
- 22 kW 400 V AC 3-Phase EV Charger: Delivers much faster charging to larger EVs, multiple vehicles, or commercial vehicles. Designed for larger homes or businesses with a 3-phase power supply.
Browse the best single-phase EV charger in Australia AND the best 3-phase EV charger in Australia from iStore, then get in touch by calling 1300 515 640 or filling out this online form.
- Published in General
Installing a Home EV Charger – Costs, Process, and Requirements
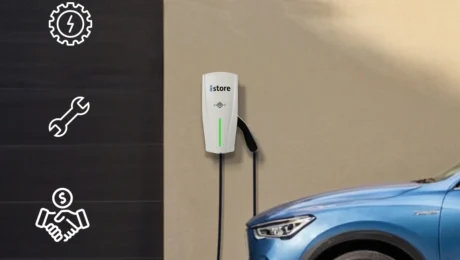
More Aussie drivers are ditching the detours to public charging stations and installing EV chargers at home for convenience, cost savings, and more eco-friendly driving.
After choosing the best EV charger for your home and vehicle, the next logical question is, “How do you install an EV charger at home?” Can you DIY, or do you need professional help?
We’re here to explain what’s involved in installing an EV charger at home, from how much it costs to the installation process, whether DIY or professional.
Why Install an EV Charger at Home?
- Greater Convenience: Charge while you’re at home during the day or sleeping at night. No need to drive out of your way or queue at public stations.
- Lower Charging Costs: Home charging is usually cheaper than public stations, especially if you set your charger to run during off-peak times. Energy providers offer discounted rates when electricity demand is lower, typically late at night or early in the morning.
- Better Energy Efficiency: Pairing your charger with solar panels, an inverter, and a battery lets you use clean, renewable energy to power your EV, cutting carbon emissions and energy bills.
- Future Flexibility: Having a charger at home means you’re ready to upgrade to a newer EV model, switch brands, or add a second EV. Most home chargers support a wide range of EVs, so you won’t need to reinstall new equipment whenever you change cars.
- Higher Property Value: Homes with EV chargers are becoming more desirable as more people switch to using EVs.
Types of Home EV Chargers
Level 1 Chargers
Your EV should come with a free Level 1 charger that plugs into a standard residential 230–240V power outlet.
With a power output of around 2.4 kW, they’re the slowest EV charger, taking 12–20+ hours to fully charge most EVs. You can expect to add 10–15 km of range to your EV per hour of charging.
Because of their slower charging speed, Level 1 chargers are a good option if you don’t drive much or only need to top up occasionally.
Most Level 1 chargers don’t offer smart features like app control or charging schedules. They also aren’t usually compatible with solar systems; instead, they draw power from the electricity grid.
Level 2 Chargers
Level 2 EV chargers use a dedicated 230–240V circuit with higher amperage to deliver more power to your car in less time than a standard power point. An electrician will wire the charger directly into your switchboard.
Most homes run on single-phase electricity, which supports Level 2 chargers with an output of around 7.2 kW. These chargers can add 30–50 km of range per hour and fully charge an EV in 4–10 hours. Larger or rural properties with three-phase power can support chargers up to 22 kW, which add up to 120 km of range per hour and deliver a full charge in just 1.5–4 hours.
You can buy a Level 2 charger from your car dealer, EV charger retailers, or online stores. They’re ideal for daily use, longer commutes, and multi-EV households.
Smart Chargers
Many Level 2 chargers include smart features such as
- App Control: Start or stop EV charging, check charging status, and get notifications through a mobile app.
- Charging Scheduling: Set the charger to run at specific times, like during off-peak hours when electricity is cheaper.
- Energy Monitoring: Track how much energy your EV uses and view your charging history to give you better insight into running costs and power usage.
- Load Management: Automatically balances the charger’s power use with the rest of your household to prevent overloading your electrical system.
- Solar Integration: Use excess solar power to charge your EV instead of drawing from the grid. Some chargers can prioritise solar usage or mix solar and grid power for maximum efficiency.
Key Requirements for Installing an EV Charger at Home
Before you install an EV charger at home, there are some important things to consider.
The power your home has affects what kind of charger you can install and how quickly your EV can charge.
Most homes in Australia use single-phase power, which can handle a basic Level 1 charger or a Level 2 charger with an output of around 7.2 kW for faster, overnight charging. Larger homes or rural properties with three-phase power can support faster chargers up to 22 kW.
If you choose a Level 2 charger, it will need a dedicated circuit so it doesn’t compete with other appliances in your home. An electrician will assess your switchboard to make sure it has enough capacity and upgrade it if needed.
Lastly, think about where you’ll install the charger. It should be near where you park your EV and within reach of the charging cable. The spot should also be easy to access, protected from the weather, and safe from potential damage. Wall-mounted units in garages or under carports are common, but outdoor setups can work too, as long as the charger is weatherproof and professionally installed.
Step-by-Step Guide to Installing an EV Charger at Home
Level 1 Charger
Installing a Level 1 EV charger is a DIY job.
- Your EV should come with a Level 1 charger. Take it out of the boot or storage compartment.
- Find a power point close to where you park your EV. A garage or undercover carport works best.
- Plug the charger into the power point. No special tools or installation are needed.
- To keep things tidy, you can mount the charger on a wall using a bracket or hook. If a bracket/hook isn’t included, you can buy one from Bunnings or an online EV accessories store.
- Plug the charger into your EV. Check your EV’s dashboard or app to track charging progress.
Level 2 Charger
Installing a Level 2 charger is more difficult and must be done by a licensed electrician. High-voltage wiring and compliance with electrical safety regulations are involved.
Your electrician will
- Assess the switchboard and wiring. They’ll inspect your switchboard to confirm it can handle the charger’s load, checking your wiring, power type (single or three-phase), and space for a new circuit breaker. Your switchboard may need an upgrade.
- Run a dedicated circuit. Because EV chargers need their own circuit, the electrician will install new cabling from your switchboard directly to the charger’s location. They’ll plan a safe, efficient cable path that avoids other wiring or plumbing.
- Install a safety switch. It is a legal requirement to install an RCD (residual current device). This safety switch reduces the risk of electric shock and faults.
- Mount the charger. Once the wiring is complete, the electrician will mount the charger on a sturdy wall or surface using a bracket or mounting kit. They’ll discuss the location with you: somewhere protected from the elements, easy to access, and near where you park your EV.
- Connect the charger and test the system. The electrician will wire the charger into your power supply, test that everything works correctly, and check that the installation meets Australian standards (AS/NZS 3000). They’ll provide a Certificate of Compliance to confirm they did the job safely and legally.
- Set up any smart features. If your charger has an app or smart control system, the electrician can connect it to your Wi-Fi and guide you through features like remote charging, scheduling, and monitoring.
- Configure solar charging (if applicable). If your home has solar panels, the electrician can link the charger to your solar system so it prioritises solar energy when available. If you also have a solar battery, they can configure your system to store daytime solar energy and use it for overnight charging.
DIY vs. Professional Installation
While installing a Level 2 charger yourself might be tempting to save money, it’s not a safe or legal option.
These chargers draw much more power than a standard appliance and must be wired directly into your switchboard. Handling high-voltage electrical work without a licence can lead to safety risks, fire hazards, and insurance issues.
DIY installation doesn’t comply with Australian electrical standards, which could void your EV charger’s warranty or create problems when selling your home.
Hire a licensed electrician to get the job done safely and correctly. They’ll make sure your switchboard can handle the charger, install the correct safety switches, and provide a Certificate of Compliance to protect your warranty and give you peace of mind.
Costs of Installing a Home EV Charger
How much does it cost to install an EV charger at home?
The answer varies depending on the charger, installation complexity, electrical upgrades, and solar integration.
As discussed, a Level 2 EV charger requires professional installation. Including labour and materials, basic installation can cost $700–$1,300. The chargers themselves can range from $500 to $2,000. So you can expect to pay a total of $1,200–$3,300.
If your switchboard is older or undersized, you could pay $900–$1,800 for a single-phase upgrade or $1,500–$3,500 for a three-phase upgrade.
If you want to integrate the charger with your solar system, there may be additional costs for solar-compatible chargers, components, and system configuration. Your electrician may charge a flat rate or by the hour for solar integration. The hourly rate could range from $80 to $130, depending on location and job complexity.
EV Charger Incentives in Australia
Some state and territory governments offer incentives for installing an EV charger at home.
In the Northern Territory, the EV Charger Grants Scheme offers $1,000 to EV owners for purchasing and installing a home charger. Over in the ACT, eligible homeowners can get a zero-interest $2,000–$15,000 loan to buy an EV charger.
There are also federal and state incentives for installing solar batteries, which can make solar EV charging more affordable.
Starting July 1, 2025, the federal Cheaper Home Batteries Program offers up to a 30% reduction in the cost of home solar batteries.
Various states provide additional incentives. For example, New South Wales offers up to $2,400 off the installation cost of a solar battery for homes with existing solar.
Why Choose iStore for Your Home EV Charger?
iStore EV chargers have everything you’re looking for in a home charger.
- High Quality: Durable, weather-resistant, and safe, with built-in protection features.
- Different Charging Options: We have a 7.4 kW 230V AC 1-phase model and a 22 kW 400V AC 3-phase model to suit various homes and charging needs.
- Competitive Pricing: Affordable without compromising on performance or safety.
- Smart Charging Technology: You can schedule charging times during off-peak electricity hours, monitor charging sessions, and integrate with your solar system from your smartphone.
- Integration With Solar Energy Systems: If you have an iStore hybrid inverter and solar battery, your iStore EV charger will seamlessly work with them to maximise energy efficiency and electricity savings.
- Local Customer Support: We’re committed to helping you with installation and maintenance by linking you up with reputable local installers.
FAQs
How Much Does It Cost to Install an EV Charger at Home?
Most EVs come with a free Level 1 charger you can install yourself.
For faster charging, you’ll need a dedicated Level 2 EV charger. These can cost $500–$2,000, with installation costing $700–$1,300.
Can I Install an EV Charger Myself?
You can install a Level 1 charger yourself by plugging it into a standard power point.
A licensed electrician must install a Level 2 charger because it requires a dedicated high-power circuit, wiring into your switchboard, and compliance with Australian electrical safety standards.
What Type of EV Charger Is Best for Home Use?
The best home EV charger is one that suits your driving habits, home power supply, and budget. Many Australian EV owners choose a Level 2 charger for faster, more convenient charging.
Can I Install a Fast EV Charger at Home?
True fast EV chargers, like those at public charging stations, are called DC chargers and aren’t suitable for homes due to their high power needs and infrastructure requirements.
For homes, the fastest charging option is a Level 2 EV charger.
How Long Does It Take to Install a Home EV Charger?
A straightforward Level 2 charger installation usually takes 2–4 hours. In that time, the installer will mount the unit, run the dedicated circuit, wire it into your switchboard, and test everything.
If your home needs a switchboard upgrade, an extensive cable run, or has a three-phase electrical setup, the job can stretch to a full day or even a few days.
Simplify Your EV Charging with iStore
If you want to charge your EV when it suits you, for less cash, and in a way that’s better for the environment, install an EV charger at home.
iStore EV chargers are affordable, high-quality, and long-lasting. And we can hook you up with expert installers in your area.
Contact us today for advice and a quote by calling 1300 515 640 or filling out this online form.
- Published in General
EV Wall Charger Buying Guide – How to Choose the Right One
So, you’ve made the switch to an electric vehicle (EV), or you’re seriously thinking about it. Excellent! EVs are quiet, clean, and cheaper to run: no petrol stops, no oil changes, just smooth rides and lower bills.
But driving electric is only half the story. The real game-changer? Charging at home. No more fighting for a spot at the local charging station or waiting around while your battery crawls from 20% to “almost there.” With an EV wall charger, your garage becomes your personal recharging station: fast, smart, and convenient.
How can you choose the right EV wall charger for your car, home, and lifestyle?
This iStore guide will tell you everything you need to know!
What Is an EV Wall Charger and How Does It Work?
An EV wall charger is a device that lets you charge your EV from home using your household power supply. You can mount it on a wall in your garage, carport, or driveway.
All EVs come with a basic charger, often called a Level 1 charger. This charger plugs into a standard power point, like your toaster or phone charger would. But it’s quite slow, taking 12–20 hours, or even longer, to fully recharge your EV’s battery.
Alternatively, Level 2 chargers are dedicated wall units that use a higher voltage to deliver power much faster. Depending on your home’s electrical setup, a Level 2 charger can fully charge your EV in 4–10 hours.
Most EV wall chargers connect directly to your home’s switchboard, drawing power through a dedicated circuit.
Many EV wall chargers, like iStore’s are part of a solar energy product lineup, letting you charge your car using free, clean energy from the sun. Some systems can even prioritise solar energy first, so you’re not drawing from expensive grid electricity unless you need to.
How to Choose an EV Wall Charger: Key Factors to Consider
Charging Speed
Charging speed refers to how fast your EV wall charger can add power to your EV’s battery. The higher the charging speed, the less time you need to plug in your EV.
Charging speed is measured in kilowatts (kW). A higher kW rating means faster charging. For example, a 7.2 kW Level 2 charger can typically add around 30 to 50 km of range per hour, depending on your vehicle. Compare that to a basic 2.4 kW Level 1 charger, which only adds 10 to 15 km of range per hour.
You must check how much power your EV can accept. Some vehicles cap out below 7.2 kW, so going for a higher-powered charger won’t necessarily speed things up.
Compatibility
You must also check how much power your home can handle. Most single-phase homes in Australia can support chargers up to 7.2 kW. Larger properties with a three-phase power supply can support chargers up to 22 kW. iStore’s EV chargers are available in either 11kW or 22kW so you can select the one most suitable for your home.
Choose a charger that delivers the maximum speed your home and EV can support, without overpaying for power you can’t use.
Then, there’s the plug. Not all EVs use the same plug. The EV wall charger you choose must match your vehicle’s connector. Most newer EVs use a Type 2 connector, which has become the standard. However, some older models or imports might use a Type 1 connector instead.
Check your EV manual or speak to your dealer before buying. Many chargers list which vehicle brands or connector types they support, so it’s usually easy to confirm.
Smart Features
Some EV wall chargers like iStores, come with smart features. One of the most useful is app control. With a connected app, you can start or stop charging from your phone, check how much charge your car has, or get alerts when it’s done.
Energy monitoring lets you see exactly how much electricity your EV uses, which is handy for tracking energy usage costs and managing your home’s overall energy usage.
Scheduling is another great feature. You can set your charger to only run during off-peak hours when electricity is cheaper.
Some chargers are demand response ready, meaning they can automatically adjust charging during peak times if your electricity provider offers incentives. It’s a way to help balance the grid and lower your electricity bills.
Many chargers can also connect to smart home systems like Google Home or Amazon Alexa, so you can manage charging with voice commands or automate it as part of your home energy routine.
If you like convenience, control, and saving money, it’s worth looking for an EV wall charger with these smart features.
Durability and Safety
Your EV wall charger must be able to handle Aussie weather if you’re installing it outdoors. Choose a weatherproof model that resists rain, heat, and dust. Most chargers including iStore’s list an IP rating (like IP65), which shows how well the unit keeps out water and dirt. A higher number means better protection.
Safety is also important. A good EV charger should have built-in protections against overheating, short circuits, and power surges. These features help prevent damage to your car and home, especially during storms or power outages.
Check for certifications that show the charger has been tested to meet Australian safety standards. Look for things like RCM (Regulatory Compliance Mark) or other recognised approvals so you know you’re buying a reliable product.
Aesthetics
While performance matters most, the look of your EV wall charger is not to be overlooked, especially if it’s mounted in a visible spot like your driveway or garage wall.
Some chargers have a sleek, modern design that will blend in with your home’s exterior, while others might stand out more than you’d like. Many brands also offer compact units with clean lines and neutral colours that won’t clash with your space.
If visual appeal matters to you, take a moment to check the size, shape, and finish of the charger before buying.
Benefits of Installing an EV Wall Charger at Home
Convenience
Having a wall charger at home means you can plug in your EV when you get home and wake up to a full battery.
No trips to a public charger, no waiting in line, no wasting time. Just easy, reliable charging on your schedule.
Cost Savings
Charging your EV at home is often much cheaper than using public charging stations. Public chargers usually charge higher rates per kilowatt-hour, and some add session or connection fees.
With a home EV wall charger, you can also take advantage of off-peak electricity rates, which are lower prices charged by your energy provider when demand is low (late at night or early in the morning). Many chargers let you schedule charging to start during these hours automatically, so you save money without lifting a finger.
Energy Efficiency
Pairing your EV wall charger with solar panels is incredibly energy efficient. Instead of drawing electricity from the grid, your charger can use the free energy your solar system produces during the day. If you also have a solar battery, you can store any extra generated solar energy and use it to charge your EV at night, maximising your solar savings.
This setup means you rely less on grid electricity, especially during peak times when prices are higher. You can charge your EV for next to nothing!
Using solar energy to charge your EV also helps reduce your carbon footprint with clean, renewable power instead of coal or gas-generated energy.
Resale Value
An EV wall charger can make your home more appealing to future buyers as more people switch to electric vehicles. For EV owners, having a charger already installed is a big plus, saving them the cost and hassle of installing one.
EV Charger Comparison
| Feature | Level 1 Charger | Level 2 Charger |
|---|---|---|
| Power Output (kW) | Approx. 2.4 kW | 3.6–7.2 kW (single-phase) / up to 22 kW (3-phase) |
| Voltage | 230–240 V (standard outlet) | 230–240 V (dedicated circuit) |
| Home Compatibility | Single-phase | Single-phase and 3-phase |
| Charging Speed | Slow | Fast |
| Charging Time | 12–20+ hours (full charge) | 4–10 hours (single-phase) / 1.5–4 hours (3-phase) |
| Range Added per Hour | 10–15 km | 30–50 km (single-phase) / up to 120 km (3-phase) |
| Installation | Simple; plugs into a standard power point. Comes with a wall bracket or hook for easy mounting | A licensed electrician must safely connect the charger to the switchboard and meet Australian electrical standards |
| Smart Features | None | Often includes app control, timers, and usage data |
| Best For | Occasional or low-mileage users | Daily charging, faster top-ups, solar integration |
| Solar Compatibility | Limited | Can integrate with solar systems |
| Cost | Typically included for free with an EV purchase | Higher (equipment + installation) |
EV Charger Incentives and Rebates Available in Australia
Some Australian state and territory governments offer incentives for installing residential EV chargers.
In the Australian Capital Territory, eligible homeowners can get a loan from $2,000 to $15,000 to buy energy-efficient products, including electric vehicle charging infrastructure. This is a zero-interest loan, and homeowners have up to 10 years to repay it.
Over in the Northern Territory, the EV Charger Grants Scheme offers a $1,000 grant to EV owners for purchasing and installing a home charger.
Federal and state-based incentives for installing solar batteries can help make solar EV charging more accessible and affordable for Australians.
Starting July 1, 2025, the federal Cheaper Home Batteries Program offers up to a 30% reduction in the cost of home solar batteries, potentially saving households up to $18,600 or 30% off the cost of a home battery.
Various states provide additional incentives. For example, New South Wales offers up to $2,400 off the installation cost of a solar battery for homes and businesses with existing solar.
How Much Does an EV Wall Charger Cost?
Most EVs come with a basic Level 1 charger. But if you want faster charging, you’ll need a dedicated Level 2 charger.
Level 2 EV wall chargers can range from $500 to $3,000. Installation, including labour and materials (wiring, circuit breakers), can cost between $700 and $1,500. So you can usually expect to pay $1,500-4500 for a Level 2 charger and installation.
How to Install an EV Wall Charger
Installing a Level 1 EV wall charger doesn’t require professional help. Simply plug the charger straight into a standard household power point. You can then mount the charger on a wall using a basic wall bracket or cable hook, which is often included or easy to buy separately.
Installing a Level 2 charger is more involved and must be done by a licensed electrician.
They will
- Inspect your switchboard and wiring. The electrician will check whether your switchboard can handle the extra load of an EV wall charger. They’ll look at your existing circuit breakers, wiring condition, and whether you have single-phase or three-phase power. Your switchboard may need an upgrade or a new circuit breaker installed.
- Plan and run a dedicated circuit. EV chargers require their own circuit, separate from other appliances. The electrician will run new cabling from your switchboard to the charger location. They’ll choose the safest and most direct route, avoiding interference with existing wiring or plumbing.
- Install a safety switch (RCD). A residual current device (RCD) must be installed to protect against electric shock or faults. This is a legal requirement in Australia.
- Mount the charger on the wall. Once the wiring is in place, the charger is mounted securely onto a solid surface using manufacturer-provided brackets. The location should be sheltered (if possible), easily accessible, and within reach of your EV’s charging port.
- Connect and test the system. The electrician will connect the charger to the power supply, test for faults, and make sure the unit complies with Australian safety standards (AS/NZS 3000). They’ll also issue a Certificate of Compliance, which confirms they performed the installation safely and legally.
- Integrate the charger with your solar system. If you have solar panels, the electrician can configure your EV wall charger to draw energy from your solar system when available. Some chargers also support solar optimisation features, which prioritise charging from solar over the grid. If you have a solar battery, your setup can be expanded to store daytime solar energy and use it for overnight EV charging.
Common Installation Challenges and How to Overcome Them
- Outdated Switchboards: Some older homes have switchboards that can’t handle the extra load of an EV charger. If yours is outdated, an electrician may need to upgrade it by adding a new circuit breaker or replacing the entire board. While this adds to the upfront cost, it’s a one-time upgrade that improves overall electrical safety in your home.
- Limited Meter Box Space: If your meter box is already full, there may not be room to add the dedicated circuit your charger needs. In this case, your electrician might install a sub-board or rearrange the layout to make space.
- Long Cable Runs: If your charger needs to be installed far from the switchboard, like at the end of a long driveway, this can increase the cost and complexity. Longer cable runs may require heavier-duty wiring to maintain performance, so it’s a good idea to choose the most direct and practical location for the charger, if possible.
- Outdoor Mounting Issues: If you’re installing the charger outside, it must be weatherproof and mounted securely. Harsh sun, rain, and dust can damage unprotected units. Look for chargers with a high IP rating (e.g. IP65), and make sure your installer places it in a sheltered area or uses a weatherproof enclosure.
- Strata or Apartment Restrictions: If you live in an apartment or unit, you might need body corporate approval before installing an EV wall charger. Some buildings also have limited electrical capacity or shared infrastructure, so check with your strata manager before making any plans.
Planning ahead and working with a licensed electrician will help you spot these issues early and find the right workaround, so you can get charging faster with fewer surprises.
How to Maintain Your EV Wall Charger
Regular care will help your EV wall charger run smoothly and safely for longer.
- Wipe the charger and cable regularly with a dry or slightly damp cloth to remove dust, dirt, and cobwebs. Avoid using harsh chemicals or high-pressure water.
- Check the charger, plug, and cable for cracks, frayed wires, or signs of damage. If anything looks worn out or loose, stop using the charger and contact your installer or manufacturer for advice.
- Check that the cable plugs in and out smoothly and the charger feels secure on the wall. If the cable is difficult to connect or the unit feels loose, a minor adjustment or servicing may be needed.
- If your EV takes much longer to charge or the charger frequently stops mid-session, there may be an issue with the hardware or the connection to your switchboard. These are signs that servicing is required.
- If you notice unusual sounds, heat, or error messages, call a licensed electrician or the charger’s support team. It’s better to check it early than risk damaging your car or electrical system.
- Many smart chargers receive software updates that improve performance or add new features. Use the app (if available) to check for updates every few months. Staying up to date helps your charger run more efficiently and keeps it compatible with future EV models or energy systems.
How to Future-Proof Your EV Charging Setup
Look for an EV wall charger that supports various charging speeds and connector types, so it’ll still work if you upgrade to a different EV down the track. Some chargers can be adjusted or reconfigured as needed, so you won’t have to replace the whole unit when changing cars.
Smart chargers that receive firmware updates are another good choice. These updates improve performance, fix bugs, and sometimes add new features without needing a new device. Updates are usually managed through the charger’s app.
If you plan to add more electrical appliances to your home, such as an electric water heater or stovetop, choose an EV charger with dynamic load management. This feature automatically balances power use across your home, so the charger doesn’t overload your system.
Why Choose iStore for Your EV Wall Charger?
iStore is a proud Australian-owned company. Our local expertise and customer support help us deliver EV charging solutions tailored to your driving habits and expectations, as well as to Aussie road and weather conditions.
Here’s what our EV chargers have to offer.
- Quality: Durable and weather-resistant.
- Safety: Built-in safety features to protect your home and vehicle.
- Compatibility: Works with various EV models, including popular Australian EVs.
- Competitive Pricing: Affordable without compromising on performance or safety.
- Sustainability: Supports environmentally-friendly EV charging, reducing your reliance on fossil fuels.
- Smart Charging Technology: Schedule charging times to coincide with off-peak electricity hours, control and monitor charging sessions, and integrate with your solar system, all from your smartphone.
- Integration With iStore Solar Energy Systems: If you have an iStore hybrid inverter and solar battery as part of a solar energy system, your iStore EV charger will seamlessly work with them to maximise energy efficiency and electricity savings.
FAQs
What Is the Best EV Wall Charger for Home Use?
The best EV wall charger is one that suits your electric vehicle, matches your home’s power supply, and offers the right balance of speed, smart features, and integrates into your solar and battery system.
How Fast Does an EV Wall Charger Charge a Car?
The Level 1 charger that comes with an EV can take 12–20 hours, or even longer, to fully recharge the EV’s battery. Alternatively, Level 2 chargers use a higher voltage to deliver power faster. Depending on the home’s electrical setup, a Level 2 charger can fully charge an EV in 4–10 hours.
Do I Need a Wall Charger for My EV?
A wall-mounted EV charger gives you a neat, secure, and dedicated spot to power up your EV at home. It’s more convenient than using a public charging station because there are no queues, no wait times, and no detours.
Do I Need a Single-Phase or Three-Phase EV Charger?
Most homes in Australia use single-phase power, which supports chargers up to 7.2 kW—enough for overnight charging. If your home has three-phase power, you can install a faster charger (up to 22 kW), but your EV must support three-phase charging to benefit.
How Much Does It Cost to Install an EV Wall Charger?
Most EVs come with a basic Level 1 charger that plugs into a standard power point. But if you want faster charging, you’ll need a dedicated Level 2 charger.
Level 2 EV wall chargers can range from $500 to $3,000. Installation, including labour and materials (wiring, circuit breakers), can cost between $700 and $1,500. So you can usually expect to pay $1,500-4500 for a Level 2 charger and installation.
Upgrade Your EV Charging with iStore
Wondering how to choose an EV wall charger?
Wonder no more! This guide covers everything you need to know, from charging speed and compatibility with your EV and your home’s electrical setup to installation costs and maintenance.
Don’t choose just any EV wall charger; choose the best EV wall charger in Australia from iStore.
Our chargers are high in quality and safety, generous in warranty (10 years!), and affordable in price.
Have questions? Need advice or a quote? Get in touch by calling 1300 515 640 or filling out this online form. Our EV charger experts are ready to help!
- Published in General
How Long Do Solar Batteries Last? Key Information for Families
Solar is fantastic…until the sun goes down! That’s where a solar battery comes in.
If you already have a solar battery, you may be wondering when it’s time for a new one. Or perhaps you’re investigating going solar and all that involves. Before you buy a solar battery, there is an important question to answer: how long do solar batteries last?
Investing in a solar battery means investing in years of energy storage, so it’s worth knowing what you’re getting for your money.
Let’s unpack how long solar batteries last, what wears them out, and how to stretch every dollar of value from your battery.
What Is a Solar Battery?
Solar panels can generate more electricity than your home uses in a day. Instead of returning unused solar energy to the grid, a solar battery stores it for later use when the sun isn’t shining, like at night or on cloudy days. It can also kick in during blackouts or when energy prices spike, keeping the lights on and costs down.
A solar battery gives you more control over your power usage, reduces your home’s reliance on the grid, and saves you money on electricity bills.
What Is the Average Lifespan of Solar Batteries?
Most solar batteries last between five and 15 years.
The exact lifespan of a battery depends on several key factors.
Factors That Affect Solar Battery Lifespan
Battery Type
Lithium-ion solar batteries are the most common option used in Australian homes. They tend to last longer, often around 10 to 15 years. They’re more efficient, hold charge better, and cope well with daily use without wearing out too quickly.
Lead-acid batteries are an older style. They’re cheaper upfront, but usually only last three to seven years. They also need more maintenance and don’t handle frequent charging and discharging as well as lithium-ion batteries.
Depth of Discharge (DoD)
Depth of Discharge (DoD) refers to how much of your battery’s stored energy your home uses before the battery starts recharging from your solar panels. For example, if a battery has a 90% DoD, you can use up to 90% of its stored energy before it starts recharging.
Regularly using a large portion of stored energy or draining the battery close to empty puts extra strain on it. That wear and tear adds up and can shorten the battery’s lifespan.
Choosing a battery with a high recommended DoD, like many lithium-ion models, helps you get more usable energy and life from it.
Usage Patterns
How often your solar battery charges and discharges (fills up with energy and then powers your home) each day plays a big role in how long it lasts. Each full round of charging and discharging is called a cycle.
Most batteries can handle thousands of these cycles, but heavy daily use can wear them out faster. If your system is set up so the battery constantly charges during the day and almost entirely drains at night, it will age quicker than one used more gently.
The fewer full cycles your battery goes through each day, the longer it’s likely to last. That’s why having the right-sized system for your energy needs can make a real difference over time.
Temperature and Climate
Solar batteries don’t like extreme heat or cold. High temperatures can age a battery faster and reduce how much charge it can hold, while freezing weather can slow performance and efficiency.
Most systems work best in mild, stable conditions. You should install your battery in a spot protected from harsh weather, like a garage, under a shade, or in a weatherproof cabinet.
Maintenance
Regular inspections and proper maintenance of a solar battery can identify minor issues before they become big problems. Check for dust, corrosion, or any warning lights on the system.
Some batteries are low-maintenance, especially lithium-ion types, but it’s still worth giving them a quick check every so often and booking a professional service yearly.
How to Maximise the Lifespan of Solar Batteries
- Avoid Overcharging/Deep Discharging: Use built-in battery protection settings or a battery management system (BMS), a tool that controls how your battery charges and discharges. These systems help prevent overcharging or draining the battery too low.
- Choose a Battery Compatible With Your Solar Inverter: Your solar battery must be compatible with your system’s solar inverter. A mismatch can lead to inefficient charging and unnecessary strain on the battery.
- Control the Temperature: Install your battery in a shaded, well-ventilated outdoor area or indoors if possible. Avoid places with extreme heat or cold, as temperature swings can damage the battery.
- Keep Up With Regular Maintenance: Check for dust, loose wires, corrosion, and system alerts every few months. Book a yearly inspection with a solar technician to keep everything in good shape.
- Use Smart Monitoring Tools: Devices like iStore’s WLAN dongle let you track battery performance, usage, and health in real time, so you can catch issues early and manage your energy more efficiently.
When Should You Replace a Solar Battery?
Even the best solar batteries wear out. Look out for these signs that it might be time for a replacement.
- Shorter Backup Time: If your battery doesn’t power your home as long as it used to, it may be losing capacity.
- Slower Charging: If the battery takes much longer to charge fully, that’s a red flag.
- Unusual Noises and Overheating: Strange sounds and excessive heat can mean something’s wrong internally.
- Warning Lights or Error Messages: Your system may alert you when the battery isn’t performing properly.
- Battery Age: If your battery is 10–15 years old, it could simply be reaching the end of its natural lifespan, even if it’s still working.
How Much Do Solar Panel Batteries Cost?
Many factors influence the cost of replacing a solar battery.
- Size: Bigger batteries (measured in kWh) cost more.
- Type: Lithium-ion batteries last longer and perform better, but cost more than older lead-acid models.
- Brand: Well-known brands come at a premium.
- Installation Complexity: Replacing or adding a battery to an existing system may require extra parts or electrical work, which adds to the cost.
- Your Location: Labour and transport costs vary. Remote or regional areas may face higher charges than metro areas.
- Extra Features: Batteries with blackout protection, smart home integration, or advanced monitoring tools usually cost more.
- Government Rebates: From July 2025, the Australian Government’s Cheaper Home Batteries Program will offer a 30% discount on eligible home batteries. Extra rebates may apply in some states.
Replacing a solar battery can generally cost between $8,000 and $14,000. For example, installing a 5 kWh battery can cost around $8,700, while installing a 15 kWh battery can cost approximately $13,550.
Why Choose iStore Solar Batteries?
Durability: Tough Tech, Built to Last
iStore solar batteries can easily handle Australia’s tough and varied climate, operating reliably in temperatures from -20°C to 55°C.
They use lithium iron phosphate (LiFePO₄) technology, which is known for its stability, safety, and long lifespan. This type of battery chemistry resists overheating, supports thousands of charge cycles, and degrades more slowly, making it one of the most durable options on the market.
Safety: Self-Protecting for a Safer Home
Our lithium iron phosphate batteries have four layers of built-in protection.
- Stable Battery Chemistry: Lithium iron phosphate (LiFePO₄) is a safer, heat-resistant battery that’s far less likely to overheat or catch fire.
- Smart Monitoring System: A built-in Battery Management System (BMS) with eight temperature sensors helps prevent overcharging, deep discharging, and overheating by automatically adjusting battery activity.
- Automatic Fire Suppression: Each battery module has a self-activating fire extinguisher that kicks in within seconds if overheating is detected.
- Weatherproof Casing (IP66 Rated): Dustproof and water-resistant housing protects the battery from rain, dirt, and extreme weather, making it safe for outdoor use.
Modular Design: Add More Power, Anytime
Each iStore solar battery is a stackable module weighing 50 kg, with a capacity of 5 kWh (kilowatt-hours). You can connect up to six modules to increase storage to a maximum capacity of 30 kWh.
Wondering how many batteries your home will need? The average Aussie home with four people uses around 20 kWh of electricity daily, which equates to four battery modules (20 kWh total capacity).
With our modular battery design, you’re not stuck with your original setup if your energy needs change later. If your family grows, you buy an electric car, or add a granny flat to your property, you can easily upgrade your battery system to keep up with the extra energy demand without replacing the entire system.
Warranty: We’ve Got Your Back
iStore solar batteries come with a 10-year performance warranty, guaranteeing reliable storage and consistent performance for years to come.
This warranty is not just peace of mind and a safety net; it’s a sign that at iStore, we back our technology to go the distance in Aussie conditions.
FAQs
How Long Do Solar Panel Batteries Last?
Most solar panel batteries last between five and 15 years, depending on the type, how they’re used, and how well they’re maintained.
How Long Do Lithium-Ion Solar Batteries Last?
Lithium-ion solar batteries typically last 10 to 15 years, thanks to their high efficiency and ability to handle regular use.
How Long Does a Solar Battery Last at Night?
It depends on your battery size and how much power your home uses, but most solar batteries can run a household for several hours to overnight on a full charge.
For example, a 10 kWh solar battery can power a home for 8–14 hours at night.
What Factors Affect the Lifespan of Solar Batteries?
- Battery Type: Lithium-ion batteries usually last longer than lead-acid ones due to better efficiency and durability.
- Usage Patterns: Using a lot of stored energy daily can put more strain on the battery and cause it to wear out sooner.
- Depth of Discharge: The more energy you regularly use from the battery, the more strain it takes over time.
- Temperature: Extreme heat or cold can reduce the battery’s performance and lifespan.
- Maintenance: Regular checks and proper care prevent damage and keep the battery running smoothly for longer.
Can Solar Batteries Be Repaired?
Solar technicians can often repair common battery issues like connection faults, software glitches, and cell balancing problems. You don’t always need a complete battery replacement.
However, if the battery is badly degraded or damaged from age, overheating, or poor maintenance, replacing it is usually the more cost-effective option.
How Much Does It Cost to Replace a Solar Battery?
Replacing a solar battery can cost between $8,000 and $14,000, depending on the battery’s capacity, brand, and installation requirements. For example, a 5 kWh battery can cost around $8,700 installed, while a 15 kWh battery can cost approximately $13,550 installed.
Starting from July 1, 2025, the Australian Government’s Cheaper Home Batteries Program will offer a 30% discount on the upfront cost of installing eligible small-scale batteries, significantly reducing replacement expenses.
Additional state and territory rebates may further lower costs, so check local programs for potential savings.
Invest in Long-Lasting Solar Batteries with iStore </h2>
If your current solar battery is showing signs of slowing down, or you’re considering switching your home to solar power, you’re likely asking: “How long do solar batteries last?”
The answer to this question will help you choose a battery that suits your long-term energy needs, budget for upfront costs, and plan for future replacements.
Where can you find reliable, durable, and safe solar batteries? And solar inverters that work seamlessly with them?
At iStore! Browse our solar battery and solar inverter range today, then get in touch for a consultation or quote by calling 1300 515 640 or filling out this online form.
- Published in General